The patient device
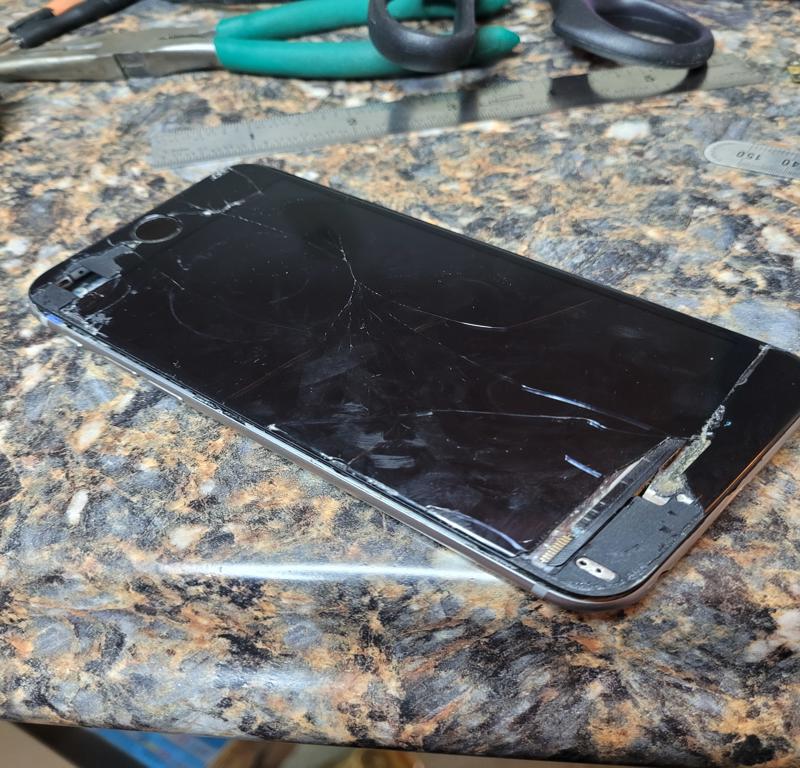
This iPhone 6S [A1633] has a broken screen. The device works (the phone boots and runs) but it has no touchscreen. The upper left corner of the screen is the only area that still has any touch functionality. The severe screen damage renders this old junk iPhone absolutely useless. Or does it?
Let’s check it out.
iPhone 6S Model: A1633 (ca. 2015)
Of course, installation of a replacement screen would be a quick solution. In this case, the owner already has all the data, and has no motivation to repair this outdated, broken device. So, why bother?
what’s really going on here?
The truth is, this iPhone 6S sample is a donation. My cousin has been an iPhone user since day one. Like many folks, she’s accumulated a small collection of broken iPhones. In passing, I had mentioned my interest in learning more about iPhone, its disassembly, re-assembly etc. Upon hearing this, my cousin gave me a couple of her old iPhones for research.
In this case, the overall goal is to successfully disassemble the device, while at the same time, leveling up my microsoldering skills. I say successfully, as it is extremely easy to destroy the microscopic size components on this logic board while you’re attempting to remove or replace anything. In this phase of the case, we’ll look at the steps required for disassembly.
In addition to disassembly, later plans may include transplanting components to and from other 6S boards, removing the NAND memory chip, and attempting to read its contents directly from the chip via ACELab PC-3000 Flash, and perhaps, a few other ‘tools of the trade’. <grin>
getting started
To get started, I did some research on disassembly of Apple model A1633. I read several documents, and carefully reviewed the procedure shown in this tutorial video. I then purchased an ‘iPhone Tool Kit’ containing the special tools required for disassembly. Before watching this tutorial, I assumed it was going to be very difficult to get the case open. As it turned out, it was quite the opposite, and the screen lifted off easily, just as it was demonstrated in the video.
removing the screen

Remove ‘pentalobe’ screws on either side of the charging port.
Screen removal was straightforward. The first step was to remove the two pentalobe (P2) screws on either side of the charging port. Once removed, the screen can be lifted just enough to get a pry tool under the edge.
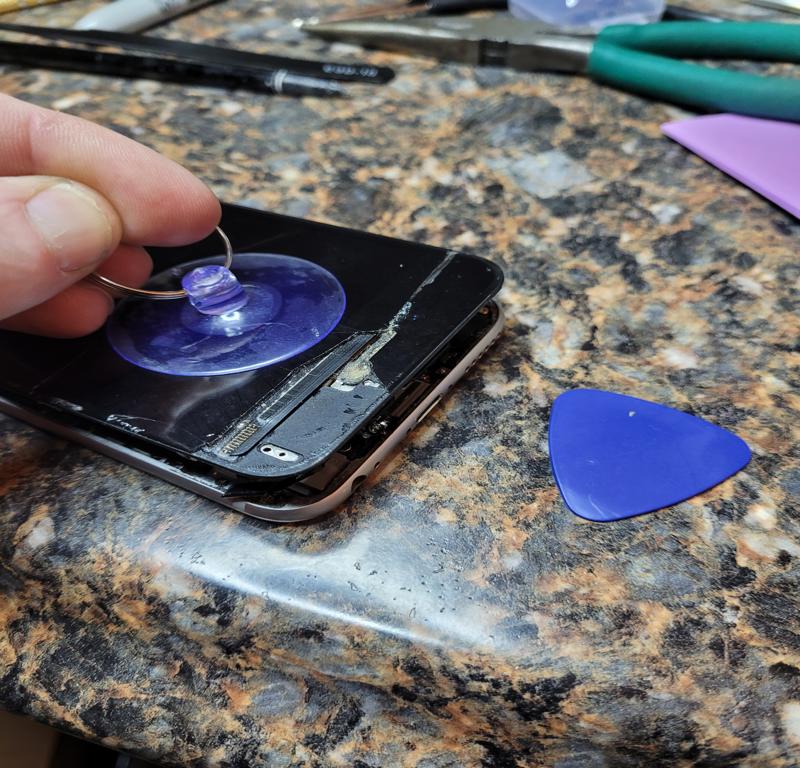
Suction cup applied just above the charging port makes removal fairly easy.
Once the screen was lifted, I used the pry tool (looks like a guitar pick) and slid it along the screen edge, inserted only far enough to pry the screen from the adhesive gasket holding it in place. If you insert the pry tool too far into the case, it’s possible to break off microscopic components mounted along the edges inside. This is a rookie mistake, and a very common mistake. Some of the components are so small, you may not even realize you’ve broken them off.
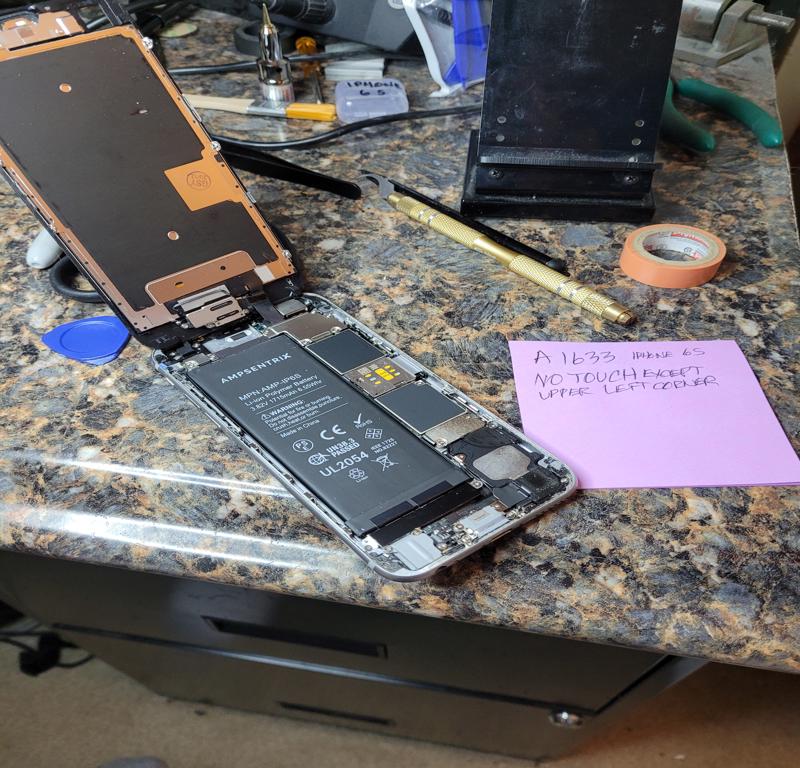
With the screen lifted it’s time to start removal of the circuit board.
critical step
Before we can go any further, the battery must be disconnected. Failure to do so will render the device inoperable, and beyond repair. Any time the device is opened, the first step must always be to disconnect the battery. To access the battery connector we first have to remove the metal housing that protects the cable.
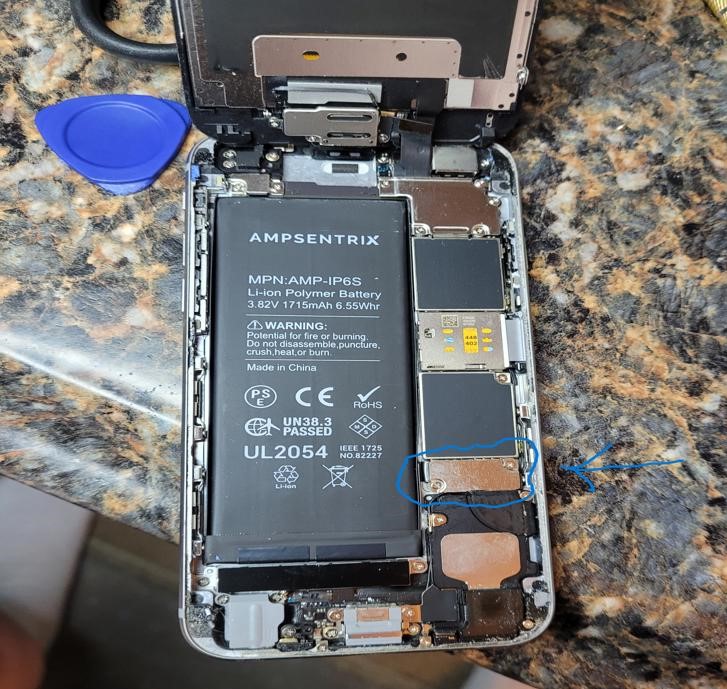
To disconnect the battery, we remove the cover. Two screws hold it down

Metal cover removed to expose the battery connector. Disconnected.