I came across the Numark Production Hub today and decided this was something I could use to solve a few issues.
Power outlets are needed on the desktop
A USB hub is needed for the W7 PC
A high current USB charging port is needed
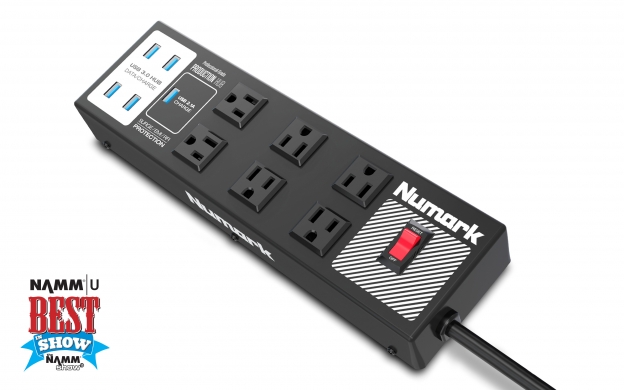
The Numark Production Hub is an AC outlet strip with a USB hub built-in. The “production” moniker is a marketing buzz word aimed at today’s audience of young “producers”. Hi Hi!
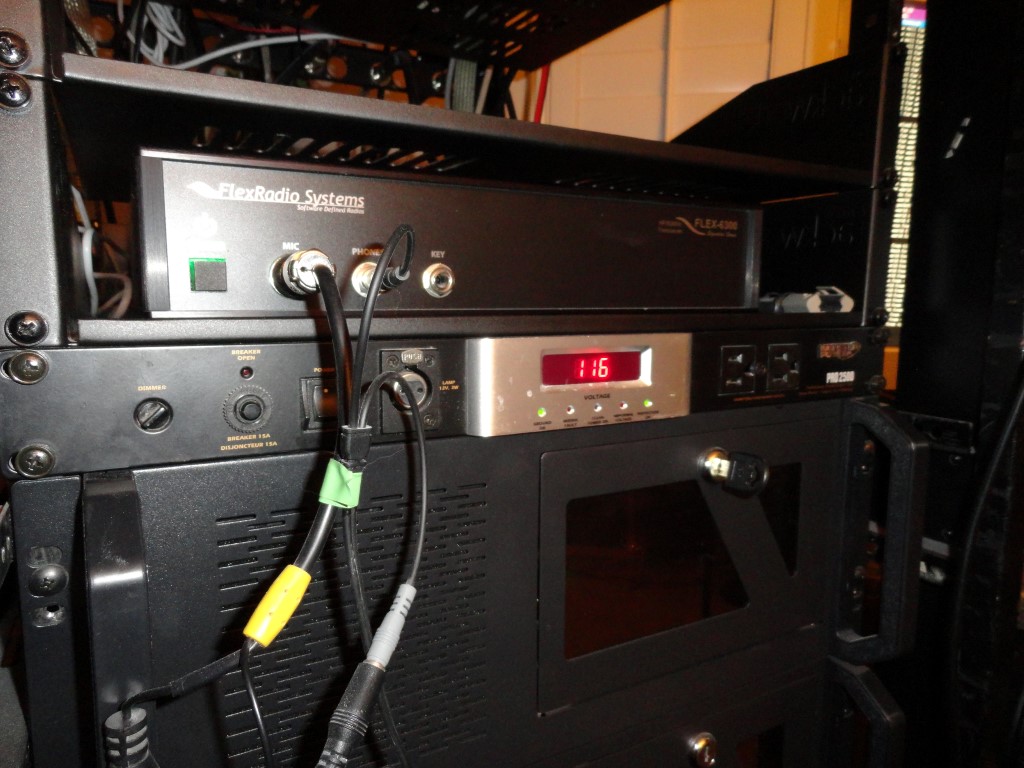
In order to make room for the Samson SM10 audio mixer, I had the move the 1U Monster Power PRO-2500 to the rear of the rack, which cost me two AC courtesy outlets.
Monster PRO 2500 was moved to the rear rack rails in favor of the SM10 mixer
Additionally, The Windows 7 PC only has two USB ports on the front, and they are not enough by a long shot.
Numark Production Hub
I also like the fact that Numark mounted the AC sockets at two angles to allow insertion of “wall warts”.
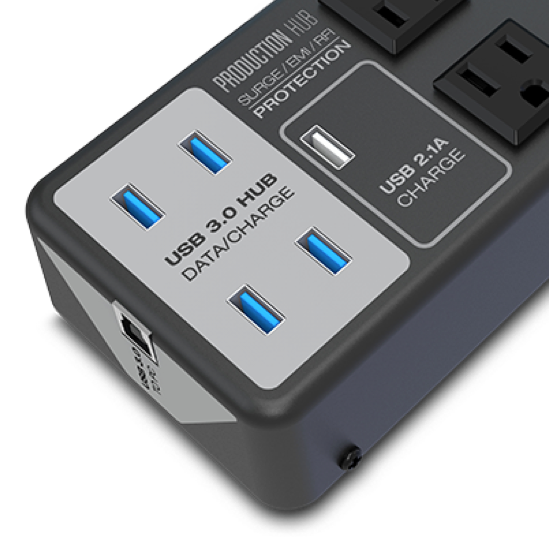
4 USB Ports and a 2.1 amp USB charging port
Even though the sockets appear at a different angle in the close up, they are indeed mounted as shown in the top photo. The deciding factor for me on this purchase was the 2.1 amp charging port. I have some 2200mah batteries in the shack that should charge much quicker on this port than they currently charge using the PC USB port.
We’ll see how it holds up to RF. If it is susceptible, and ferrites don’t help, I’ll return it. All in all, the Numark Production Hub fits the bill in this case.
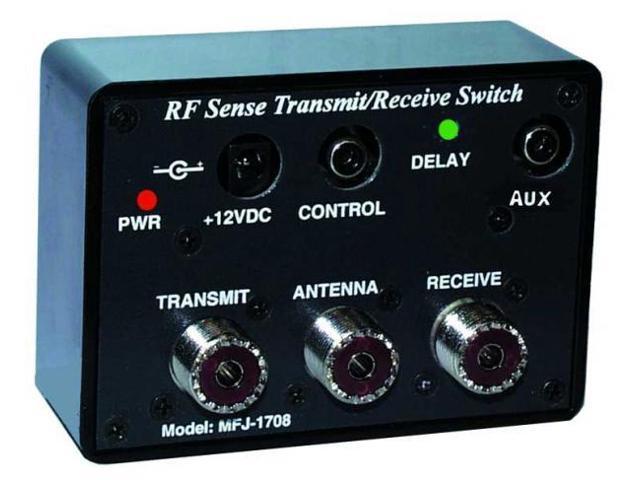
This neat little MFJ automatic T/R switch senses transmitted RF and switches your antenna from receive to transmit using a relay. It shorts your receiver antenna input to ground to protect your receiver. It also provides an auxiliary contact closure to ground during receive (opened in transmit) for an “On-the-Air” sign or other use, perhaps even a TX Interlock line. The adjustable delay means I can fine tune it for perfect open/close.
Instead of using RF sense to switch the antenna, a control line input lets your key/keyer or PTT line switch the antenna. An adjustable time delay circuit gives you delayed switching. This prevents your antenna from switching between dots and dashes or between syllable and words.
Works on all modes — CW, AM, SSB, FM, and digital modes. It handles 200W SSB PEP. Compact 4 W x 2 5/8 H x 1 1/2 D inches.
It has SO-239 coax connectors for antenna, transmitter, and receiver. It has control input, auxiliary contact closure to ground, time delay screwdriver adjustment, power jack. Requires 12 VDC or 110 VAC with MFJ-1312D
I plan to use this switch so I can listen on my IC-765, but transmit from my Flex 5000 HF port. The MFJ-1708 is rated for 200 watts
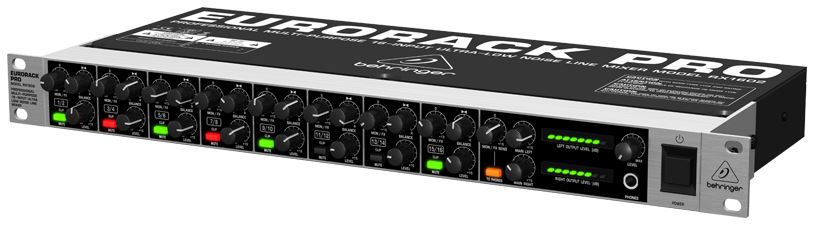
Before purchasing the Samson SM10 mixer I did a little more research and revisited the Behringer product line. The Behringer Eurorack Pro RX1602 mixer fits the bill at a fraction of the price of the SM10.
BEHRINGER EURORACK PRO RX1602
BEHRINGER EURORACK PRO RX1602 Professional Multi-Purpose 16-Input Ultra-Low Noise Line Mixer
Extremely flexible multi-purpose sub-mixer, multi-track monitoring mixer and level translator
16 balanced high-headroom line inputs for individual stereo or mono use of each section
Ultra-low noise ULN design, highest possible headroom, ultra-transparent audio
Dedicated balance and level controls plus +4/-10 level selection per channel
Monitor/FX Send control per section with global master send control for flexible monitoring, recording or effects applications
Illuminated double-function “mute” button per section with additional “clip” indication provides comfortable input source/level information
Monitor/FX signal assignable to phones output for added flexibility
Highly accurate 2 x 7-segment LED level meters and individual level control for left and right main mix signal
1/4” TRS main mix outputs plus easily accessible headphones output on the front panel with dedicated level control
High-quality detented rotary controls for long-term reliability
Shielded toroidal power transformer for lowest noise interference
High-quality component components and exceptionally rugged construction ensure long life
Behringer and Samson are very similar in build quality, features etc. so the Behringer Eurorack Pro RX1602 is a direct replacement for the Samson SM10.
Intended use:
FLEX 6300 (L/R)
FLEX 6700 (L/R)
FLEX 5000 (L/R)
W7 PC AUDIO
W10 PC AUDIO
PRO 2006 (MONO)
SPARE
SPARE
I’ll set all the inputs at -10db sensitivity, and run the balanced SEND output to the Flex 6700 Line Input. No change in functionality, although the Samson has more features, they are not features I need for this application, nor are they features I need to pay more for.
UPDATE 11/24/18: The Behringer ‘bargain’ mixer failed after a few months use, and was replaced with an SM10.
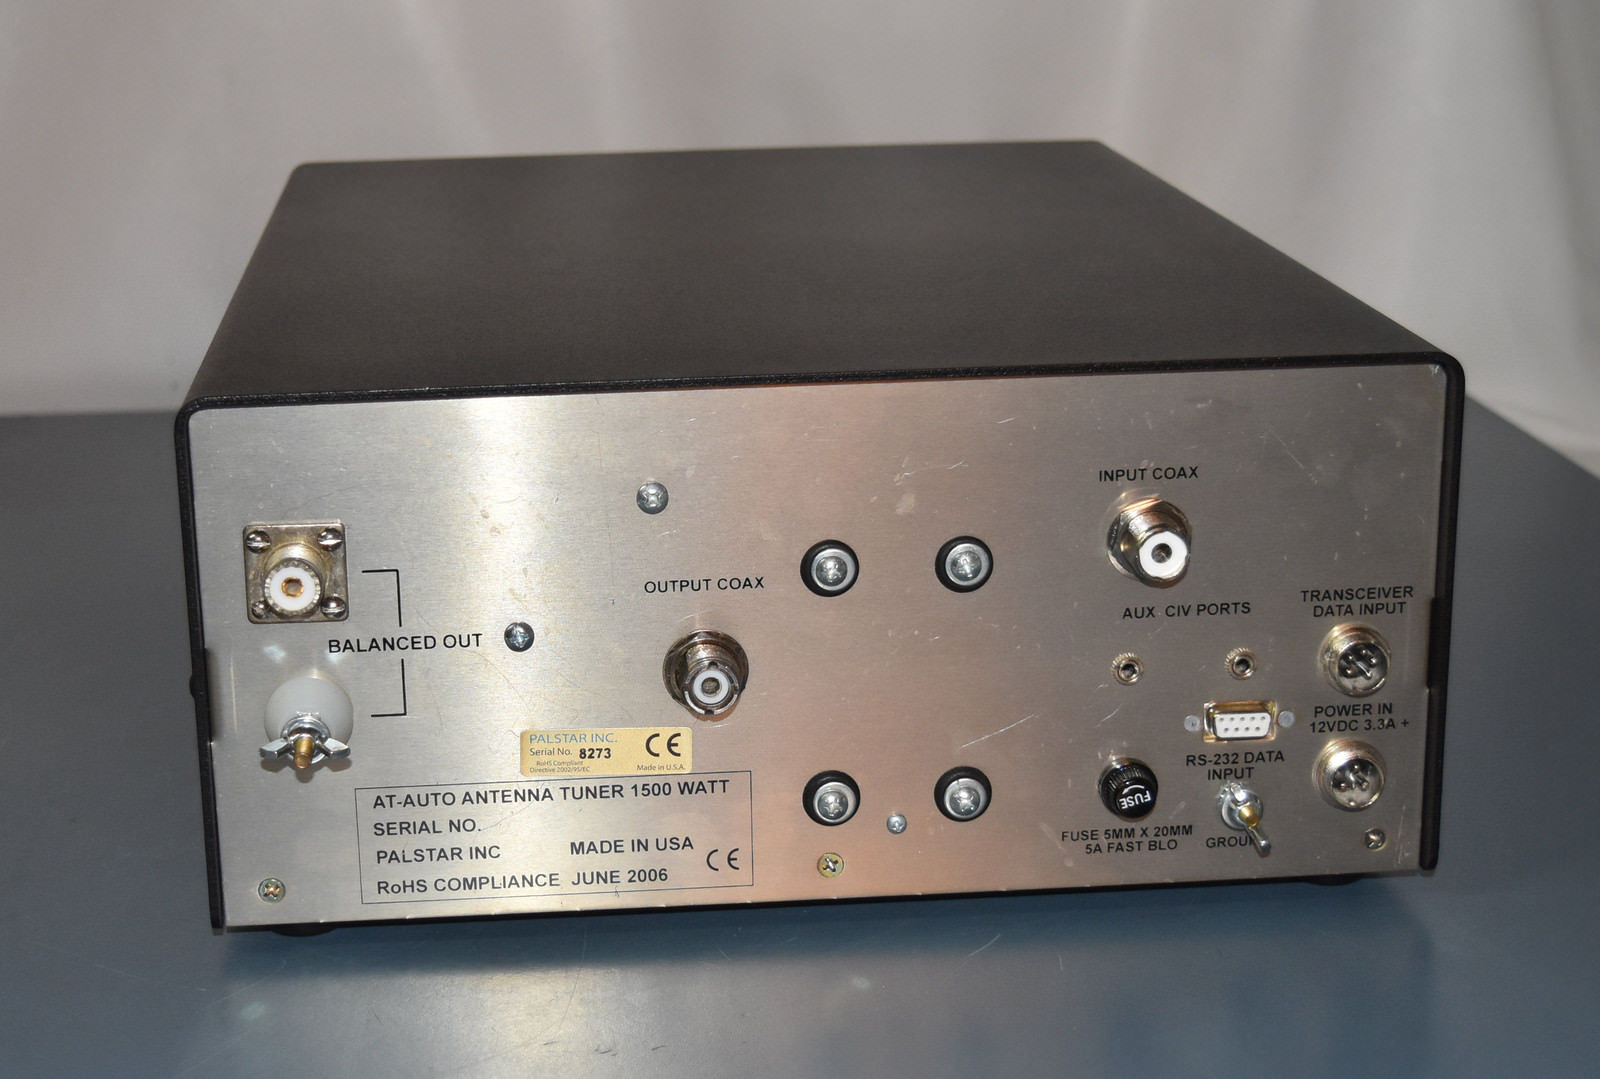
This is an interesting modification for the AT-AUTO. This mod adds a second SO-239 coaxial output in place of one the posts normally used for the “balanced” antenna output. It’s a Palstar AT-AUTO Mod that I think I may need one day. The instructions are simple and I found a few photos of modified units on the web.
I found this information on the Kessler Engineering website:
You have two options. We would prefer that you purchase the accompanying CX-AUTO which provides eight coaxial outputs. However, if you prefer to simply add a second coaxial output and don’t need the balanced output, we recommend the following procedure:
Unsolder the balun lead at the antenna relay.
Remove one of the balanced output connector “Bolts” and associated nylon insulating hardware.
Insert an SO-239 connector in the vacated balanced output connector.
Solder a #14 wire from the center-pin of the SO-239 connector to the relay contact which previously went to the balun.
If you follow these steps, this modification can readily be “undone” and no added holes, etc. will be necessary. The firmware will associate the “new” coaxial output with the “Balanced” memory settings, etc., and will be selected whenever “balanced” or “bal” is shown in the AT-AUTO display.
I’ll use a ‘bulkhead’ type so-239 connector (like the others), not a panel mount. No drilling.
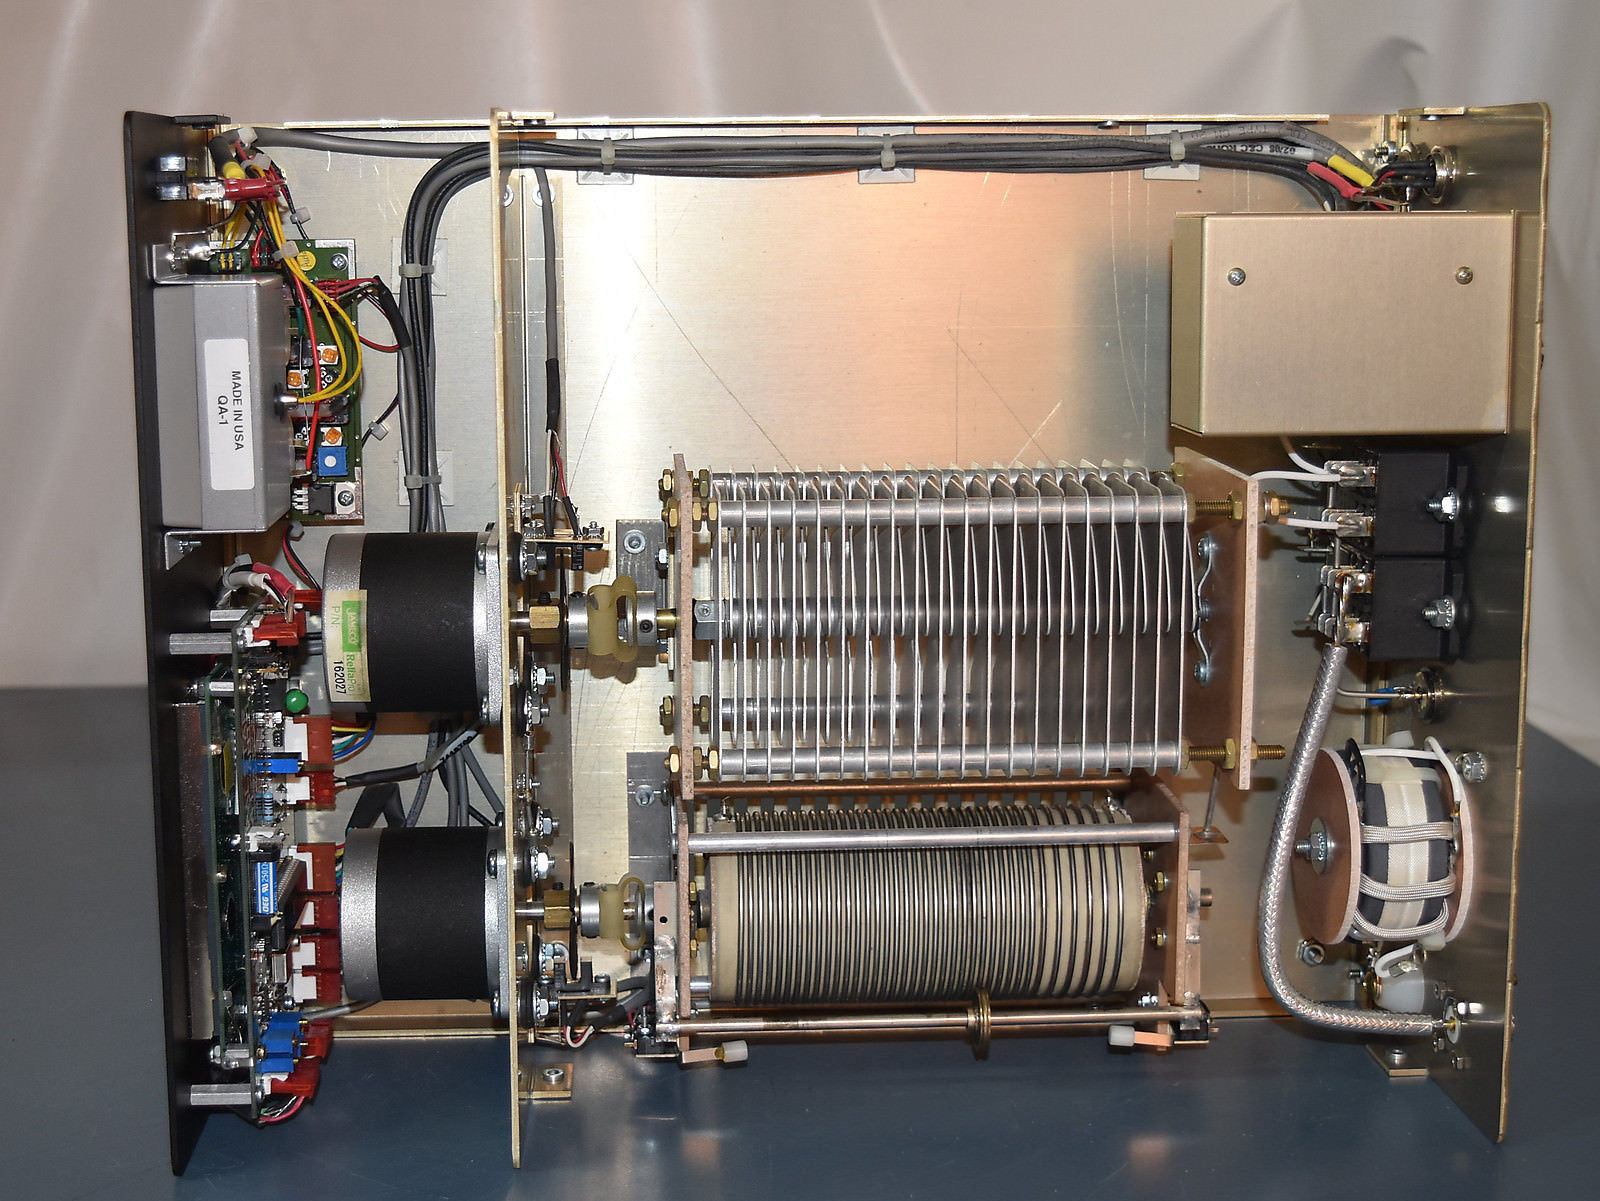
Here’s an inside view of the Palstar AT-AUTO Mod:
The balun is disconnected and the jumper is installed in its place (lower left)
I currently have two HF wire antennas on the roof that I am not using. If I perform this mod on both of my AT-AUTO’s I could regain use of both of these antennas, a G5RV, and a second 130ft dipole (in a different direction than the ‘main’ dipole. aka [DIPOLE1]
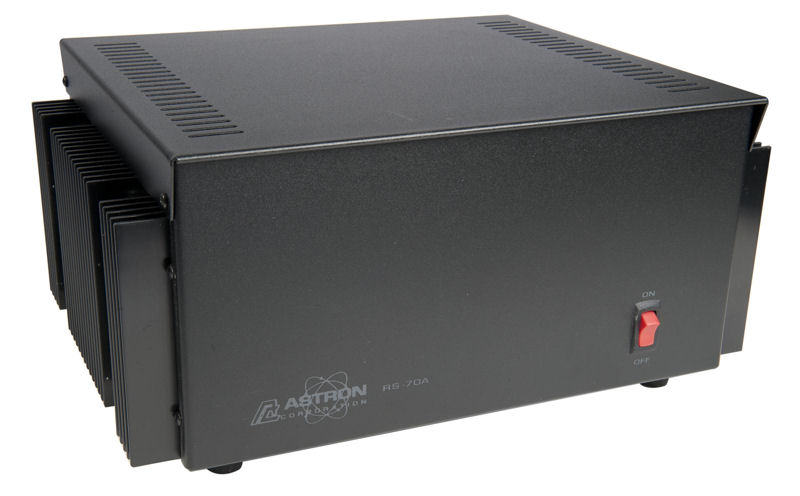
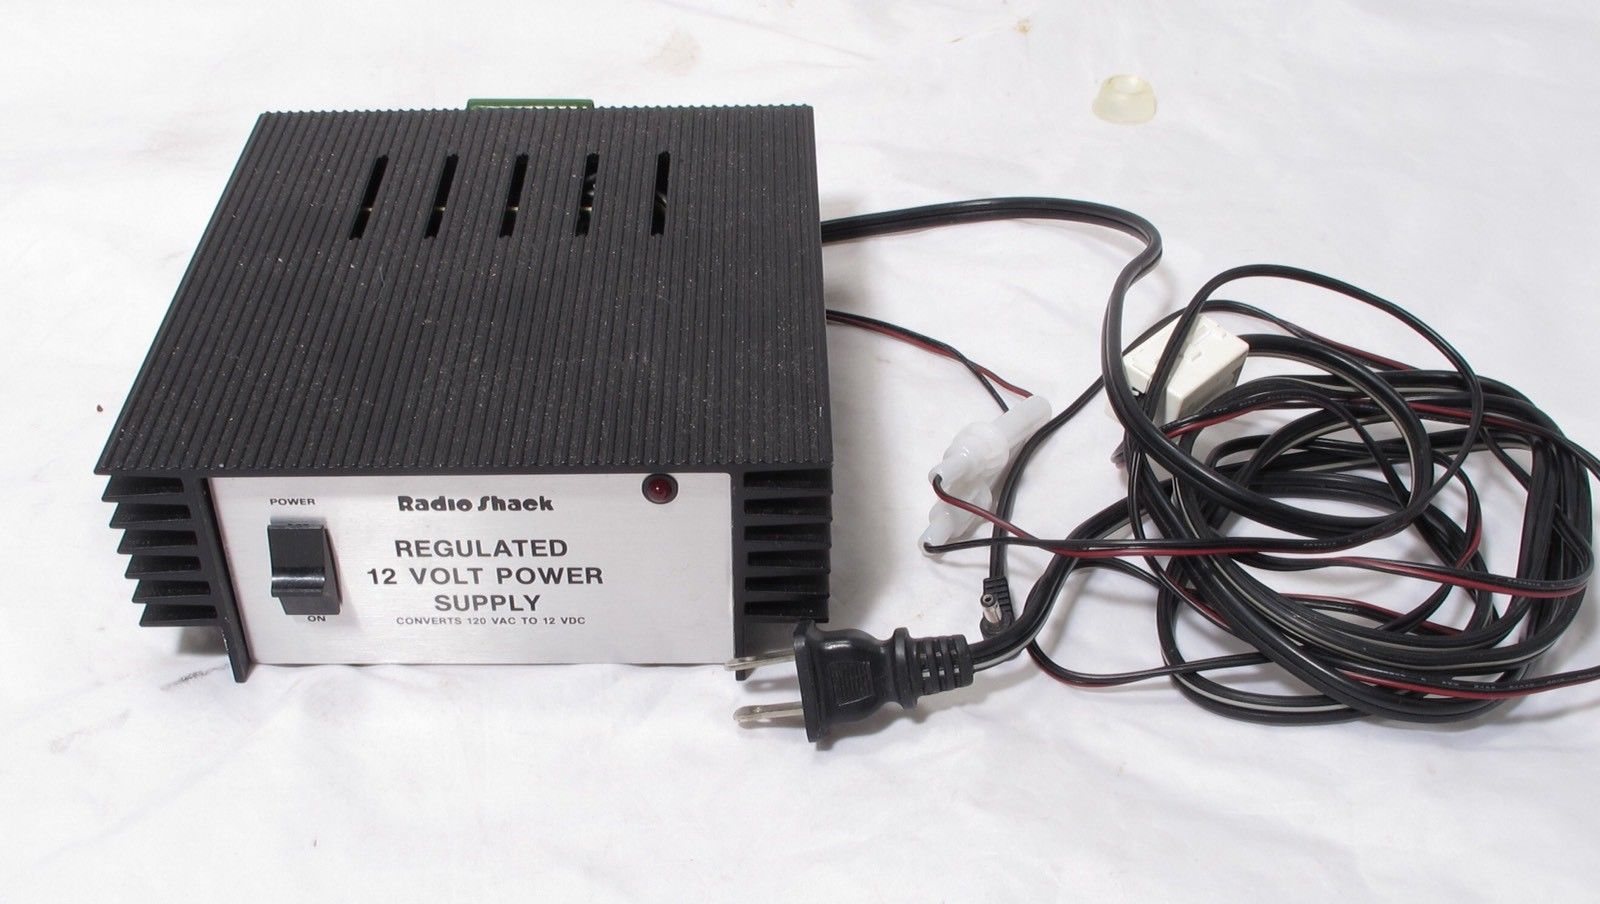
I purchased the Astron RS-70A Regulated Power supply after obtaining less than desirable results from some of the smaller Astron supplies. I’d also accumulated a few too many of the small Radio Shack 12v supplies. As everytime one was taxed, I’d just add another one.
I decided it was time to invest in the last power supply I would ever need
I went through several of the Astron 20 and 35 amp models early on (during my ICOM days). Believe it or not, every one of my Radio Shack supplies have not only survived, but remain in service to this day, after decades of 24/7 use. If you look through some of my shack pictures over the years you’ll no doubt notice them!
I have several of these in continuous operation since the 1990’s
I found my RS-70A on eBay of all places. Someone bought it for a project that fell through and dumped it on eBay at half price. Lucky for me, this was yet another bona fide ‘score’. It arrived in a rounded out cardboard box, but luckily, made the trip unharmed. It was obviously brand new. I almost felt bad for the seller.
Plenty of ‘headroom’ in the RS-70A at 57 amps continuous
Astron RS-70A Regulated Power Supply Specifications:
Fold-Back Current Limiting Protects Power Supply from excessive current &
continuous shorted output.
Crowbar Over Voltage Protection
Maintain Regulation & Low Ripple at low line input voltage.
Heavy Duty Heat Sink
Chassis Mount Fuse
Three Conductor Power Cord
Specifications
Input Voltage 105 – 125Vac
Output Voltage 13.8Vdc +/- 0.05Volts (internally Adjustable 11-15V)
Ripple Less than 5mV peak-peak (full load & low line)
Continuous Duty 57 Amps
ICS 70 Amps
Size 6″ x 13-3/4″ x 12-1/2″
Shipping Weight 48 lbs.
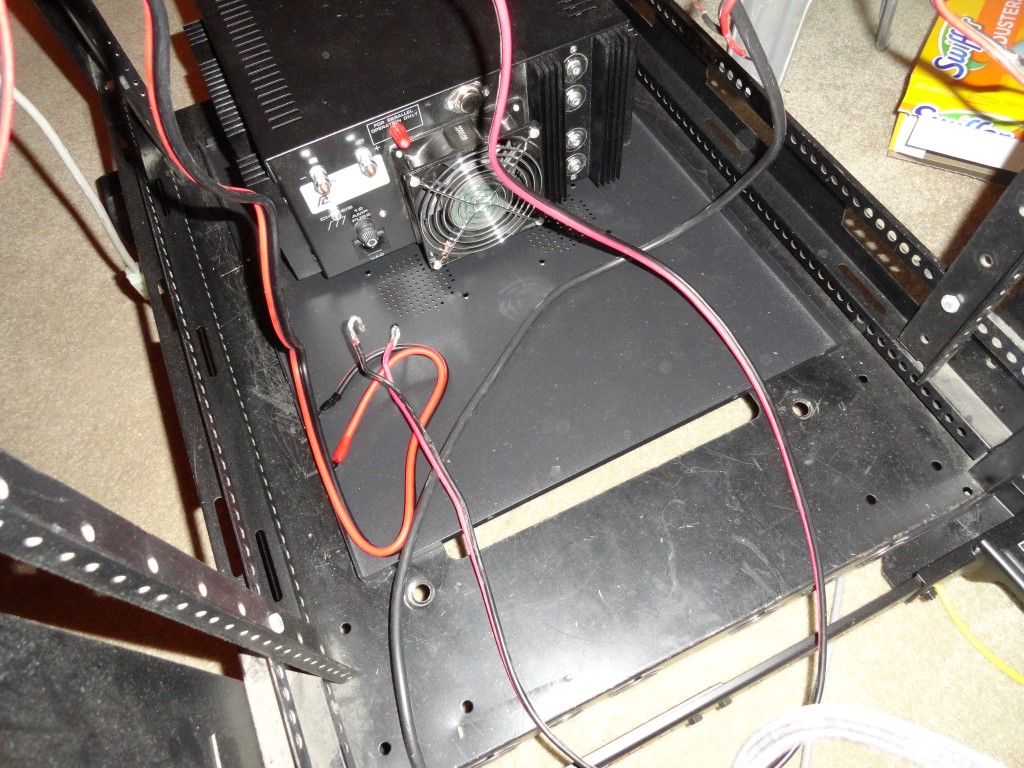
The ‘business end’ of the RS-70A
I have my Flex 6300 connected directly to the RS-70. I also directly connected an MFJ-1118 DC Power Panel to supply 12 volts to the rest of the 12v equipment in the rack.
I am currently on the lookout for a second RS-70A to keep as a backup. My current RS-70 is a central point of failure and redundancy is a must. I doubt I’ll find another new one at half price, but when I find one with the ‘right’ price, I’ll have a spare!
My Mosley TA-33-JR-N WARC Multiband HF Yagi is going to be 14 years old next month. I’ve never had a single problem with this antenna. It has been installed on my roof tower since May 2004. I’ve worked the world with this “Junior” antenna!
Back in October 2016 I began seeing high SWR numbers and decided to go up on the roof and take a look. Here’s what I found:
This is LMR-400 after 12 years in the Southern California sun
OK, before you say it, yes, this is Times Microwave (the genuine article). The outer jacket had disintegrated in the sun. I noticed the increased SWR after it had rained one day. Further, it had seemed to improve after a few days, and I reasoned this was because something had dried out.
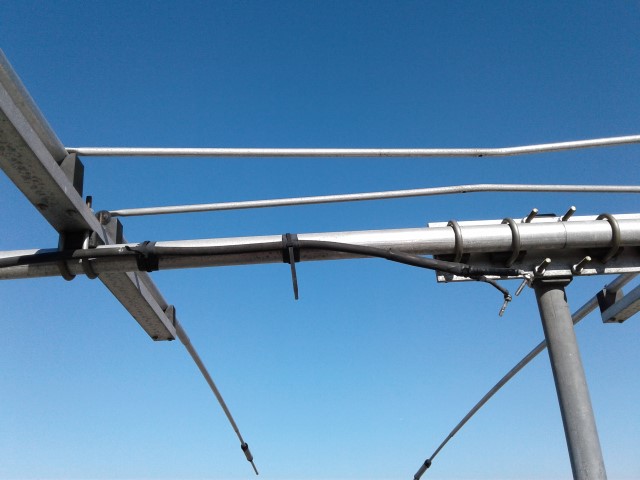
Feed point connection on the TA-33-JR-N WARC
I was concerned these bolts might not come out very easily. However, with some gentle taps they came right out. Some evidence of corrosion can be seen. When I installed this antenna in 2004, at the suggestion of one of my elmer’s at the time, I sprayed the elements and boom with Krylon ‘clear coat’ to help prevent corrosion. I think it was a sound decision, since the antenna still looks great overall considering its age.
Of course, I had to replace the sun damaged feedline
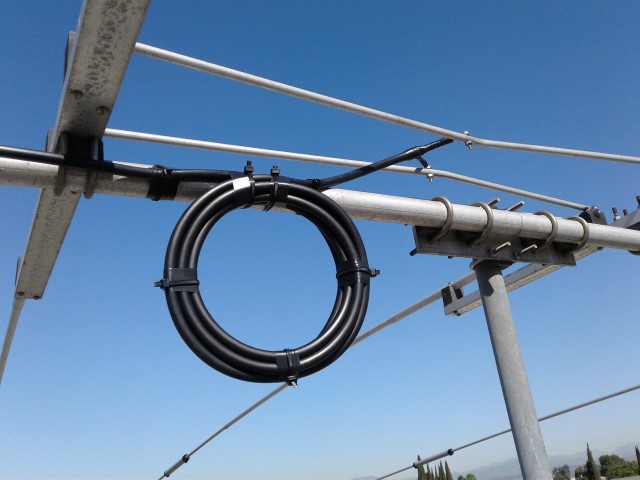
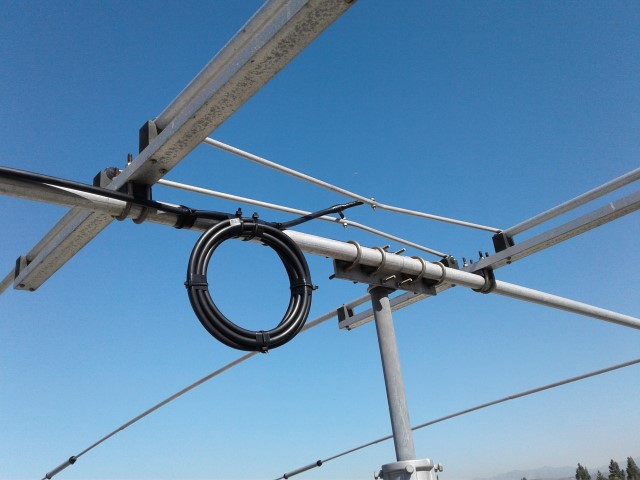
Mosley TA-33-JR-N WARC – Coax Balun
At the suggestion of the fine folks at Mosley, I added a 6 inch (inside diameter) loop consisting of FIVE turns of the new LMR-400 Ultra Flex coax.
The Mosley engineer told me to mount it on the boom close to the feedpoint.The patented Mosley Feed System
From the Mosley website:
COAX AND FEED SYSTEMS
Feed Systems – The Simpler, The Better…
Despite popular belief, linear radiators, normally employed in 2 and 3 element parasitic arrays, have a driving point impedance of close to 52 ohms when open at the center. To feed such a radiator it is only necessary to connect a 52 ohm line at this point to achieve the best possible match of line to antenna. However, because of certain design characteristics, some beam antennas require elaborate and, sometimes, unstable matching devices such as Gamma or T-Match systems or variations of these systems. Such devices are usually difficult to adjust and to maintain in adjustment when used in multi-band beams.
MOSLEY TRAP MASTER beams, however, are so designed as to not require any unwieldy matching arrangements. Mosley beams are fed by connecting the line directly to the open center of the radiator. Thus, an excellent match is achieved over the entire width of each Ham band resulting in extremely low SWR near resonant frequencies of each band and the ability to range from one end of the band to the other without excessive SWR. By eliminating such matching devices, MOSLEY TRAP MASTER beams provide their users with stable and dependable operation without the necessity of frequent trips to the roof or up the tower
to make readjustment.
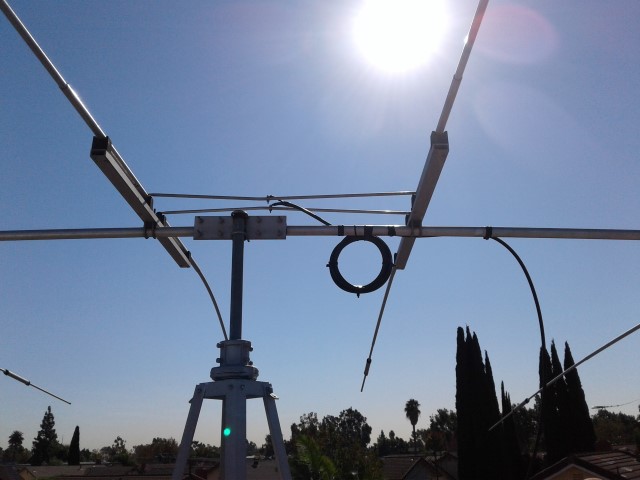
New coax in the harsh California sun!
The end result was well worth the bit of effort it took to add the coax balun. The antenna exhibits excellent SWR. The Mosley TA-33-JR-N WARC will be my main HF antenna for the foreseeable future, and certainly, for as long as I live at this QTH.
I know, Lou Reed is completely off topic. But some may find this story interesting. Back when I was in high school I played in a local rock band. We played ‘original’ music and performed publicly in places like CBGB, Great Gildersleeves, Trude Heller, and many of the other cool clubs in 1970’s NYC. One night we had a special guest appearance by Lou Reed.
Lou Reed’s Coming!
His guest appearance was made possible through a connection one of our guitar players had. IIRC he worked as a roadie for Reed, or was somehow in Reed’s periphery, and claimed he could get Reed to jam with us at a gig. Truth is, we were told several times by the guitarist that Reed would be coming, and after awhile (3 or 4 false alarms) his announcements were taken far less seriously.
The first time he announced ‘Lou Reed is coming tonight’ I called up all my friends to come down. They jammed the joint. Everybody showed up except Lou Reed. After the second false alarm they were all like ‘call us when he actually shows up’. Who could blame them.
Trude Heller
Then, on some random weeknight in April 1976, while appearing at Trude Heller, Lou Reed did indeed join us onstage for an impromptu jam session. Once I got over the surprise of him actually showing up, I only had time to make one phone call. I reached a friend in Brooklyn and told him Reed was standing in front of me, and he agreed to round up some friends and drive over to the city.
Now I just hoped they would arrive before Reed left!
Trude Heller on the corner of “9th and 6th”
Luckily, a handful of my friends showed up in time to see the jam session. One of them even remembered to bring a camera! Well, the camera jammed, and for all these years there was nothing but fading memories of the event among the small number of attendees.
My Recent Discovery
During the assembly stages of my rack mount project, I was looking through some storage items and came across my collection of old cassette tapes. I was the guy in the band that always recorded everything, recorded all the bands I ever played in. Don’t have pictures, but I have these old recordings.
It’s been a very long time since I looked at these tapes. I’d say probably 40 years or so. I pulled this one out to take a closer look:
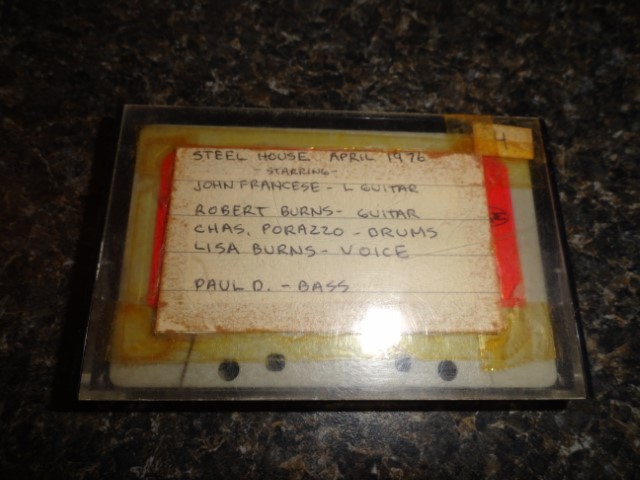
Cassette Tape dated April 1976
Yep, just another band tape.. Until I opened it up:
The biggest surprise of all! Possible evidence of the show?
I have no direct recollection of making a recording that night. It was not until I saw the tape again, now 42 years later, that I would actually open it and look at the label. You can imagine…right?
It would be likely for me to have my ‘cassette’ with me that ‘random weeknight in April 1976’. This is not such a stretch, since I took it with me every time I did music. I sometimes carried it around the street with me when I was a kid, like a boom-box (before they had such things)
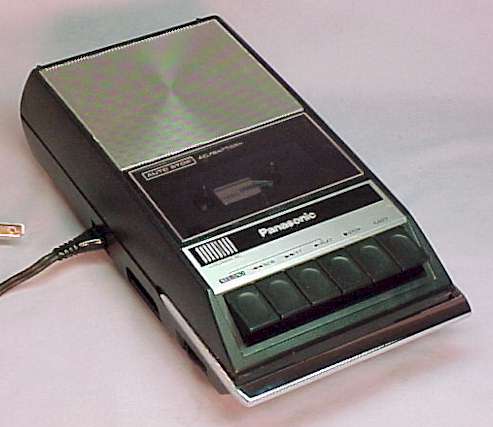
Old School Cassette Player
The Lou Reed cassette tape (and all of my cassettes for that matter) would be recorded on this exact model machine. I bought this Panasonic back in the days when I had my NY Daily News paper route.
My 1970’s cassette recorder. Used to record all my bands as a kid.
The tape looked loose inside the cassette, so I very carefully wound the tape (with a BIC pen of course) from one end to the other, and back again, using a very slight back tension and I could see some wrinkles and rough spots in the tape.
What’s On The Tape?
I have a pretty good idea what to expect on this tape. I’ll explain.
I’m certain this tape has not been played since the night it would have been recorded. It went into a box with all my other tapes, and since then, I’ve just carried them around with me all these years. The only cassette player I have now is in my car. (Yeah, I know, why get a new car when you can get some new radio equipment instead) I don’t want to try to play it in the car for obvious reasons. If it tangles in the car’s cassette player it might be hard to extract.
One of the gents at work has a high end studio cassette deck. He’s having it calibrated before our sessions begin. Actually, he has all the machines required:
I plan to hire him to copy all the analog tapes in my accumulation and convert them to files. It’s a really big job. I have a lot of tapes, in several different formats. I’ll completely organize everything before each session, so I don’t waste any time. I’ll start with the cassettes, then the 1/4″ 4 Track 7″ reels, and so on.
Meeting Lou Reed – April 1976
I remember being called backstage to meet ‘Lou’ and being reminded to ‘be cool’ before I met him. I remember Lou was buggin’ out, and he had a friend with him named Rachel. He was really a humble sweet guy, who stopped by to jam with us! How cool was this!
Yours Truly 1976
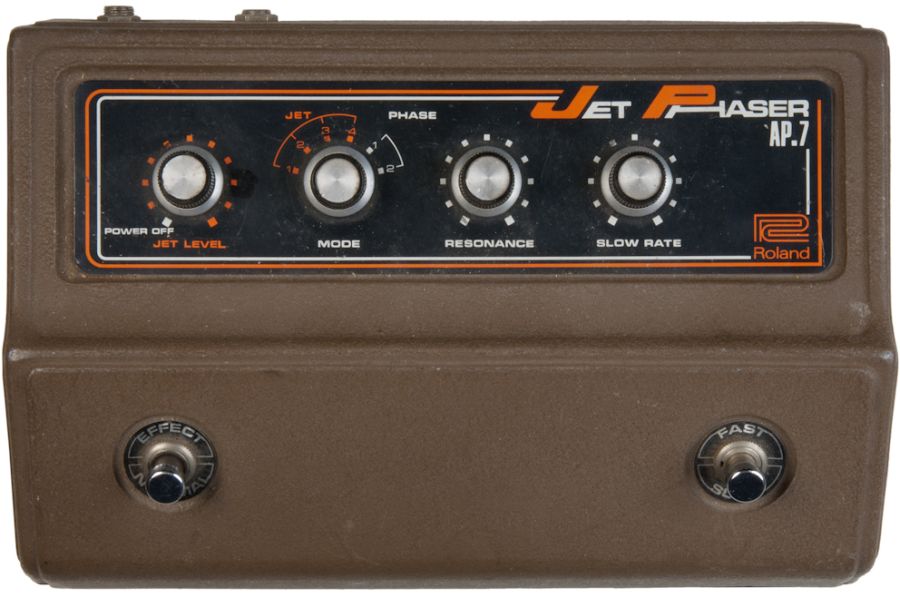
The one thing that everybody remembers about that night was Lou’s “Jet Phaser”
Lou Reed used a Roland AP.7 Jet Phaser that night at Trude Heller
He came to play with an electric guitar and this pedal. The rig made a god awful sound with this pedal. It was totally insane. I remember Lou more or less just banged on the guitar, like he was mock playing it, and messed around making crazy jet noises with this pedal and his whammy bar. I’ll never forget it. I was puzzled at the time, I thought we were going to do some music.
Greatest Coincidence In My Lifetime!
If there’s actually a recording (not just words on a label) I would expect to hear the infamous Jet Phaser. Also, sometimes when the stage was small, like at Trude’s, I would place the recorder on top of my bass amp. So this tape may be phaser noise drowned out by the bass amp. I don’t remember Lou singing anything, or speaking on the mics, but who knows.
Believe it or not, during a break at a business meeting in 2004, I overheard a fellow manager (from the music retail business) telling a Lou Reed story to some of the other guys, so I went over to listen. It was incredible, he was telling a story about Lou Reed coming into his store and buying the Roland Jet Phaser on his way to a gig ‘downtown somewhere’. I nearly had stroke! When I told him what happened and we compared notes we determined it could have only been that same day. If the tape is good my buddy JC will be among the first to know.
Of course, there’s only one way to find out. It won’t be long. I will update the story the same day I hear the tape. Hopefully it’s what the label say’s it is. More later.
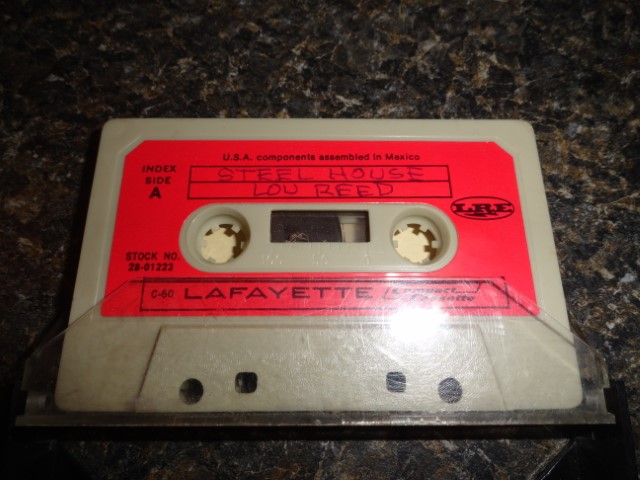
UPDATE 12/29/18
The tape was blank on one side, and had a Steel House rehearsal on the other side. Perhaps recorded over Lou Reed.
I was looking through the Yoast SEO settings and came across ‘breadcrumbs’. It seems like something I must have, and does not appear difficult to implement. Yoast SEO Breadcrumbs are a navigation aid for the WordPress website, and can be added to the “Theme” of the site.
When Hansel and Gretel went into the woods, Hansel dropped pieces of bread on the ground so they could find their way home if the two of them ever got lost. These breadcrumbs eventually became the model for the breadcrumbs we see on websites nowadays. A breadcrumb is a small text path, often located at the top of a page. On yoast.com, for instance, the path to our Yoast SEO plugin page is Home > Software > WordPress Plugins > Yoast SEO for WordPress. This breadcrumb immediately shows you where you are. Every part of that path is clickable, all the way to the homepage.
Breadcrumbs also appear in Google. If you use Yoast SEO or add the correct form of structured data to your site, search engines can pick up this data and could show your breadcrumbs in the search results. These provide users an easy to understand overview of where the page sits on your site.
I’m in. I carefully typed in the code snippet adding it to the bottom of my theme’s header.php file. This should help improve traffic and site navigation, and help prevent the dreaded “Bounce Rate”
Advantages to using breadcrumbs
There are a couple of advantages to using breadcrumbs on your site. Let’s go over them quickly:
1. Google loves them
Your visitors like breadcrumbs, but Google likes them as well. Breadcrumbs give Google another way of figuring out how your website is structured. In addition to that, Google might use your breadcrumbs to show these in the search results. This way, your search result will at one become much more enticing to users. To increase the chance to get these breadcrumbs in Google, you need to add structured data or use Yoast SEO.
2. They enhance the user experience
People hate to get lost. When confronted with a new location, people often look around in search of recognizable objects or landmarks. The same goes for websites. You need to keep visitors happy and reduce as much friction as possible. Breadcrumbs can help your user experience since it is a well-known interface element that instantly shows people a way out. No need to click the back button!
3. They lower bounce rates
Hardly anyone comes in via the homepage anymore. It’s all organic search nowadays. That means every part of your site could be an entry point. You must come up with a way to guide these visitors to other parts of your site if the selected page does not meet their expectations. Breadcrumbs can lower bounce rates because you’re offering visitors an alternative means of browsing your site. Don’t you think it’s better to send a visitor to your homepage than back to Google?
When I assembled my current lot of PC hardware I decided to install all Solid State Drives. At the time SSD’s were still relatively new, and once I saw how much faster they were than the mechanical drives, I went all in. The time has come to consider more current SSD storage options, as my SATA II 3Gb/s SSD’s are now several years old, and have fallen behind the ‘speed curve’ of current day SSD technology. I also noticed that the lowest score in my Windows 7 “Experience Index” is the disk data transfer rate @ a 7.0 score. That being said, I’ve started looking into SSD upgrades.
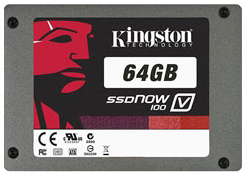
I purchased these Kingston SSDNOW V100 drives circa 2010. At the time I had met a hardware reviewer who would sell the samples he was given once he had finished his reviews. The prices were good enough that I bought a few from him, a couple of 128GB drives and a 64GB drive and converted my two machines to SSD. Whatever mechanical drives I had leftover would be used as backup data drives, where their slow speed wouldn’t matter as much. I run the two 128GB drives in RAID 0 and installed Windows 7 64bit.
My current SSD’s are slow by today’s standards
SSD Storage Options – 2018
A lot has happened in the world of SSD technology since 2010!
I’m researching an SSD storage upgrade compatible with my existing hardware.
At first I was focused on SATA III 2.5″ format, but quickly learned the real speed in SSD technology now lies in NVMe PCIe M.2 drives. I don’t want to replace motherboards (running in rock solid configurations) to accommodate this upgrade, and, lucky for me, it now looks like I won’t have to.
NVMe PCIe M.2
A suitable technology choice has emerged, and much to my surprise, it will not involve much compromise. I’ll explain…
My existing motherboard (of which I have a brand new spare) does not have SATA III, so that immediately eliminated the 2.5″ drives for me. Nor does it have an M.2 connector. (my motherboard is also from 2010) But what it does have is an available PCIe 2.0 x4 slot.
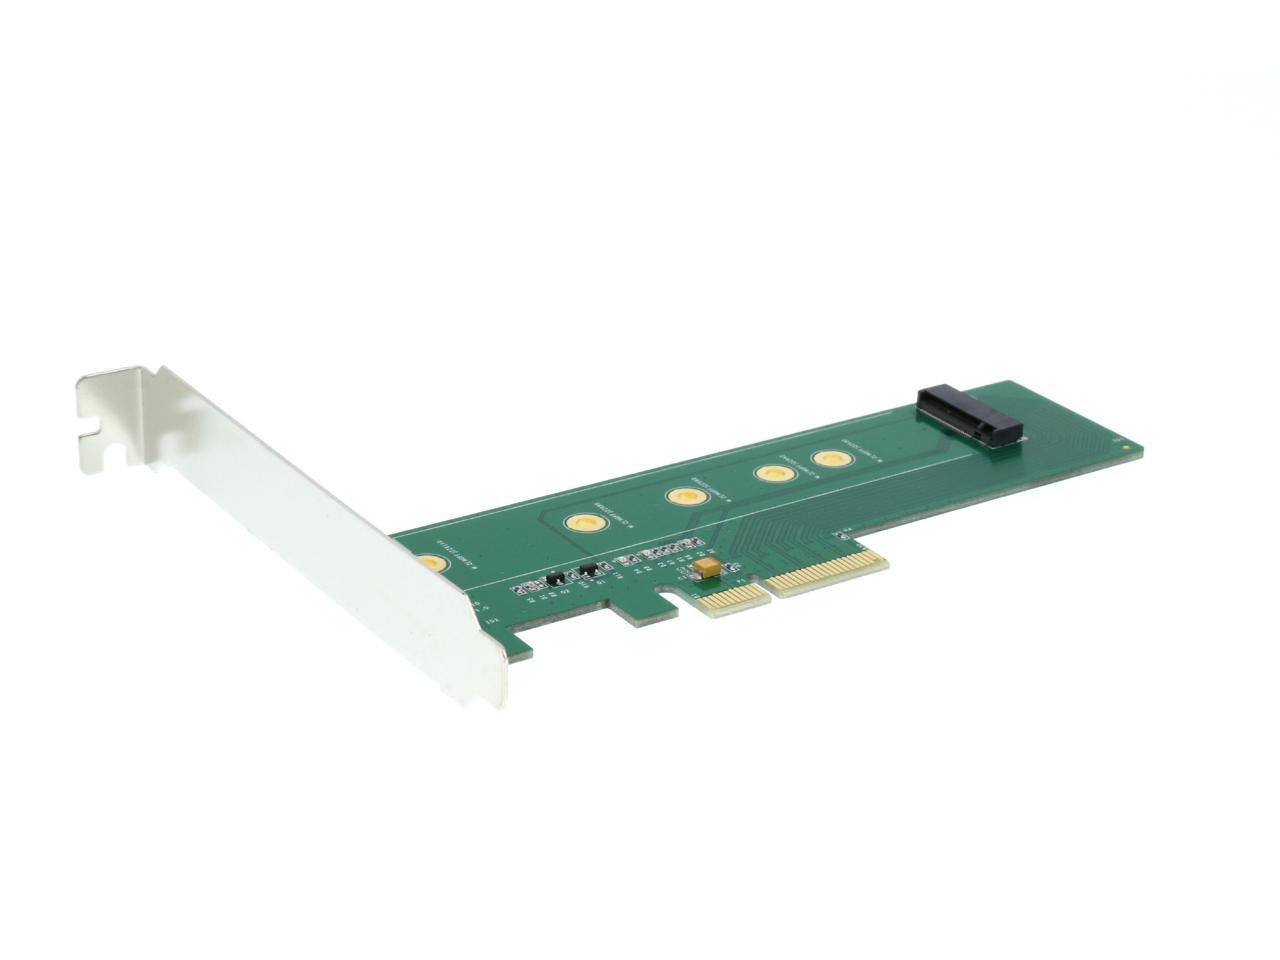
Just as I was wondering how this new drive would fit in the PCIe slot, I found the adapter.
SYBA M.2 PCI-e To PCI-e 3.0 x4 Card Model SI-PEX40110
So the compromise, to call it that, is the PCIe 2.0 x4 slot on my existing motherboard. The SYBA adapter is a PCIe 3.0 device that is compatible with PCIe 2.0 (the reason I’m lucky) I’m also happy to be letting go of the RAID 0 array. It has performed well for me all these 8+ years.
The adapter
Convert M.2 NGFF PCI-e based SSD to work in main board PCI-e x4/8/16 bus slot
PCI Express 3.0 x 4 Lane Host adapter
Movable M.2 NGFF stand-ff and multiple plated-holes supports type 22110, 2280, 2260, 2242, and 2230 SSD
Supports PCI-e 1.0, PCI-e 2.0, and PCI-e 3.0 motherboard
Low Profile Bracket included
Transparent to the OS and no driver required (Plug n Play)
I also have the option of removing a video card from a PCIe x8 slot and putting the drive there if there is any benefit. I’m guessing whatever difference may exist, it would likely be imperceptible to me in day to day use.
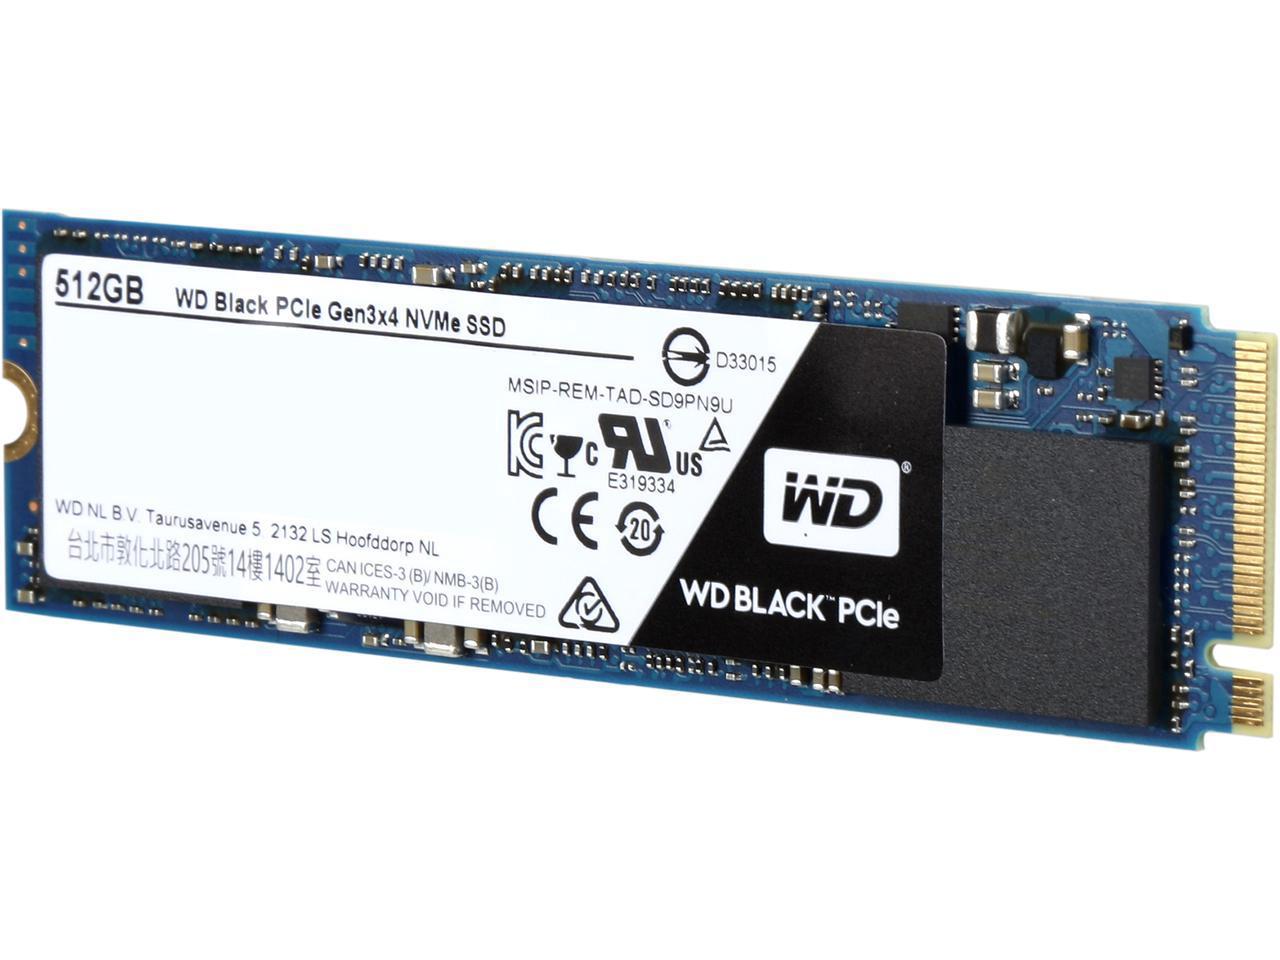
Overall, the WD Black is probably the best PCIe SSD Western Digital could have built using their SanDisk planar TLC NAND. It’s clearly a much faster low-end PCIe offering than the Intel SSD 600p despite the latter’s potential advantage from using 3D TLC NAND. The pricing will determine which one is a more sensible purchase.
I’m assuming that the current third-party Amazon sellers charging above MSRP will soon be undercut by retailers selling their stock close to MSRP. The price Western Digital is asking is about 10% higher than what the Intel SSD 600p is currently going for. For users with light to moderate workloads the cheaper 600p will still be plenty fast, but if you have a particularly heavy workload or expect to operate the drive nearly full, the WD Black is probably a worthwhile step up. There are also quite a few options just above the WD Black in price that have a clear performance advantage. Among them the Plextor M8Pe seems to have better pricing and performance than the Patriot Hellfire, but there may be other Phison E7 drives besides the Hellfire that are cheap enough to undercut the M8Pe and be a nicee step up from the WD Black.
WD Black
All things being more or less equal, why pay more? I feel at this point I’ve read enough about both units, and certainly will not perceive the differences in use. So I will save a few dollars and purchase the Western Digital WDS512G10XOC
Exploring all available SSD storage options was the right approach.
It’s hard to believe how many power outages occur in my neighborhood. If it weren’t for the UPS Back Up Power Supply I’d be offline constantly.
From /var/log/apcupsd.events:
2018-02-04 09:57:52 – Shutdown
2018-02-14 13:17:10
2018-02-14 13:20:37
2018-02-16 10:18:36
2018-02-16 14:57:37
2018-02-24 07:41:01
2018-02-24 07:40:56
2018-02-27 10:40:40
2018-03-02 17:41:14
2018-03-02 17:41:17
2018-03-02 10:27:48
2018-03-02 10:27:50
2018-03-03 07:40:16
2018-04-05 12:42:52
2018-04-05 19:07:48 – Shutdown
2018-04-20 17:11:04 – Shutdown
2018-05-02 17:40:41
2018-05-02 17:48:44
2018-05-11 05:04:17
Finding replacements
Every time the power goes out we’re told that they are “replacing some old equipment in the area”. Needless to say, that excuse is getting pretty old itself. Luckily, these events usually don’t last long, and the UPS successfully keeps everything alive. Of the 19 events since February 2018, three resulted in shutdowns when the UPS battery ran out. Of course, we’re never notified in advance of any of these ‘repairs’ so a UPS Backup Power Supply (or two) are required.
That being said, amateur radio station K6HR currently employs two Uninterruptible Power Supplies (UPS). The most recent outage revealed that my older UPS, an APC LS 700 is in need of replacement. A quick look at ‘apcaccess’ quickly confirmed it:
APC : 001,036,0870
DATE : 2018-05-13 21:23:30 -0700
HOSTNAME : gw.k6hr.ampr.org
VERSION : 3.14.14 (31 May 2016) debian
UPSNAME : apc700
CABLE : USB Cable
DRIVER : USB UPS Driver
UPSMODE : Stand Alone
STARTTIME: 2018-05-12 11:10:33 -0700
MODEL : Back-UPS LS 700 STATUS : LOWBATT
LINEV : 114.0 Volts
LOADPCT : 0.0 Percent
BCHARGE : 0.0 Percent
TIMELEFT : 0.0 Minutes
MBATTCHG : 5 Percent
MINTIMEL : 3 Minutes
MAXTIME : 0 Seconds
SENSE : Medium
LOTRANS : 106.0 Volts
HITRANS : 133.0 Volts
ALARMDEL : 30 Seconds
BATTV : 11.7 Volts
LASTXFER : No transfers since turnon
NUMXFERS : 0
TONBATT : 0 Seconds
CUMONBATT: 0 Seconds
XOFFBATT : N/A
SELFTEST : NO
STATFLAG : 0x05000040
SERIALNO : 3B0726X84715 BATTDATE : 2007-06-30
NOMINV : 120 Volts
NOMBATTV : 12.0 Volts
NOMPOWER : 410 Watts
FIRMWARE : 19.b5 .D USB FW:b5
END APC : 2018-05-13 21:23:56 -0700
I could replace the battery in the LS 700, but after 11 years in service, it’s time to upgrade to a more up to date piece of hardware. I will likely relegate the LS 700 to a lower priority application. (i.e. the home entertainment center) since it is still in working condition other than the depleted battery.
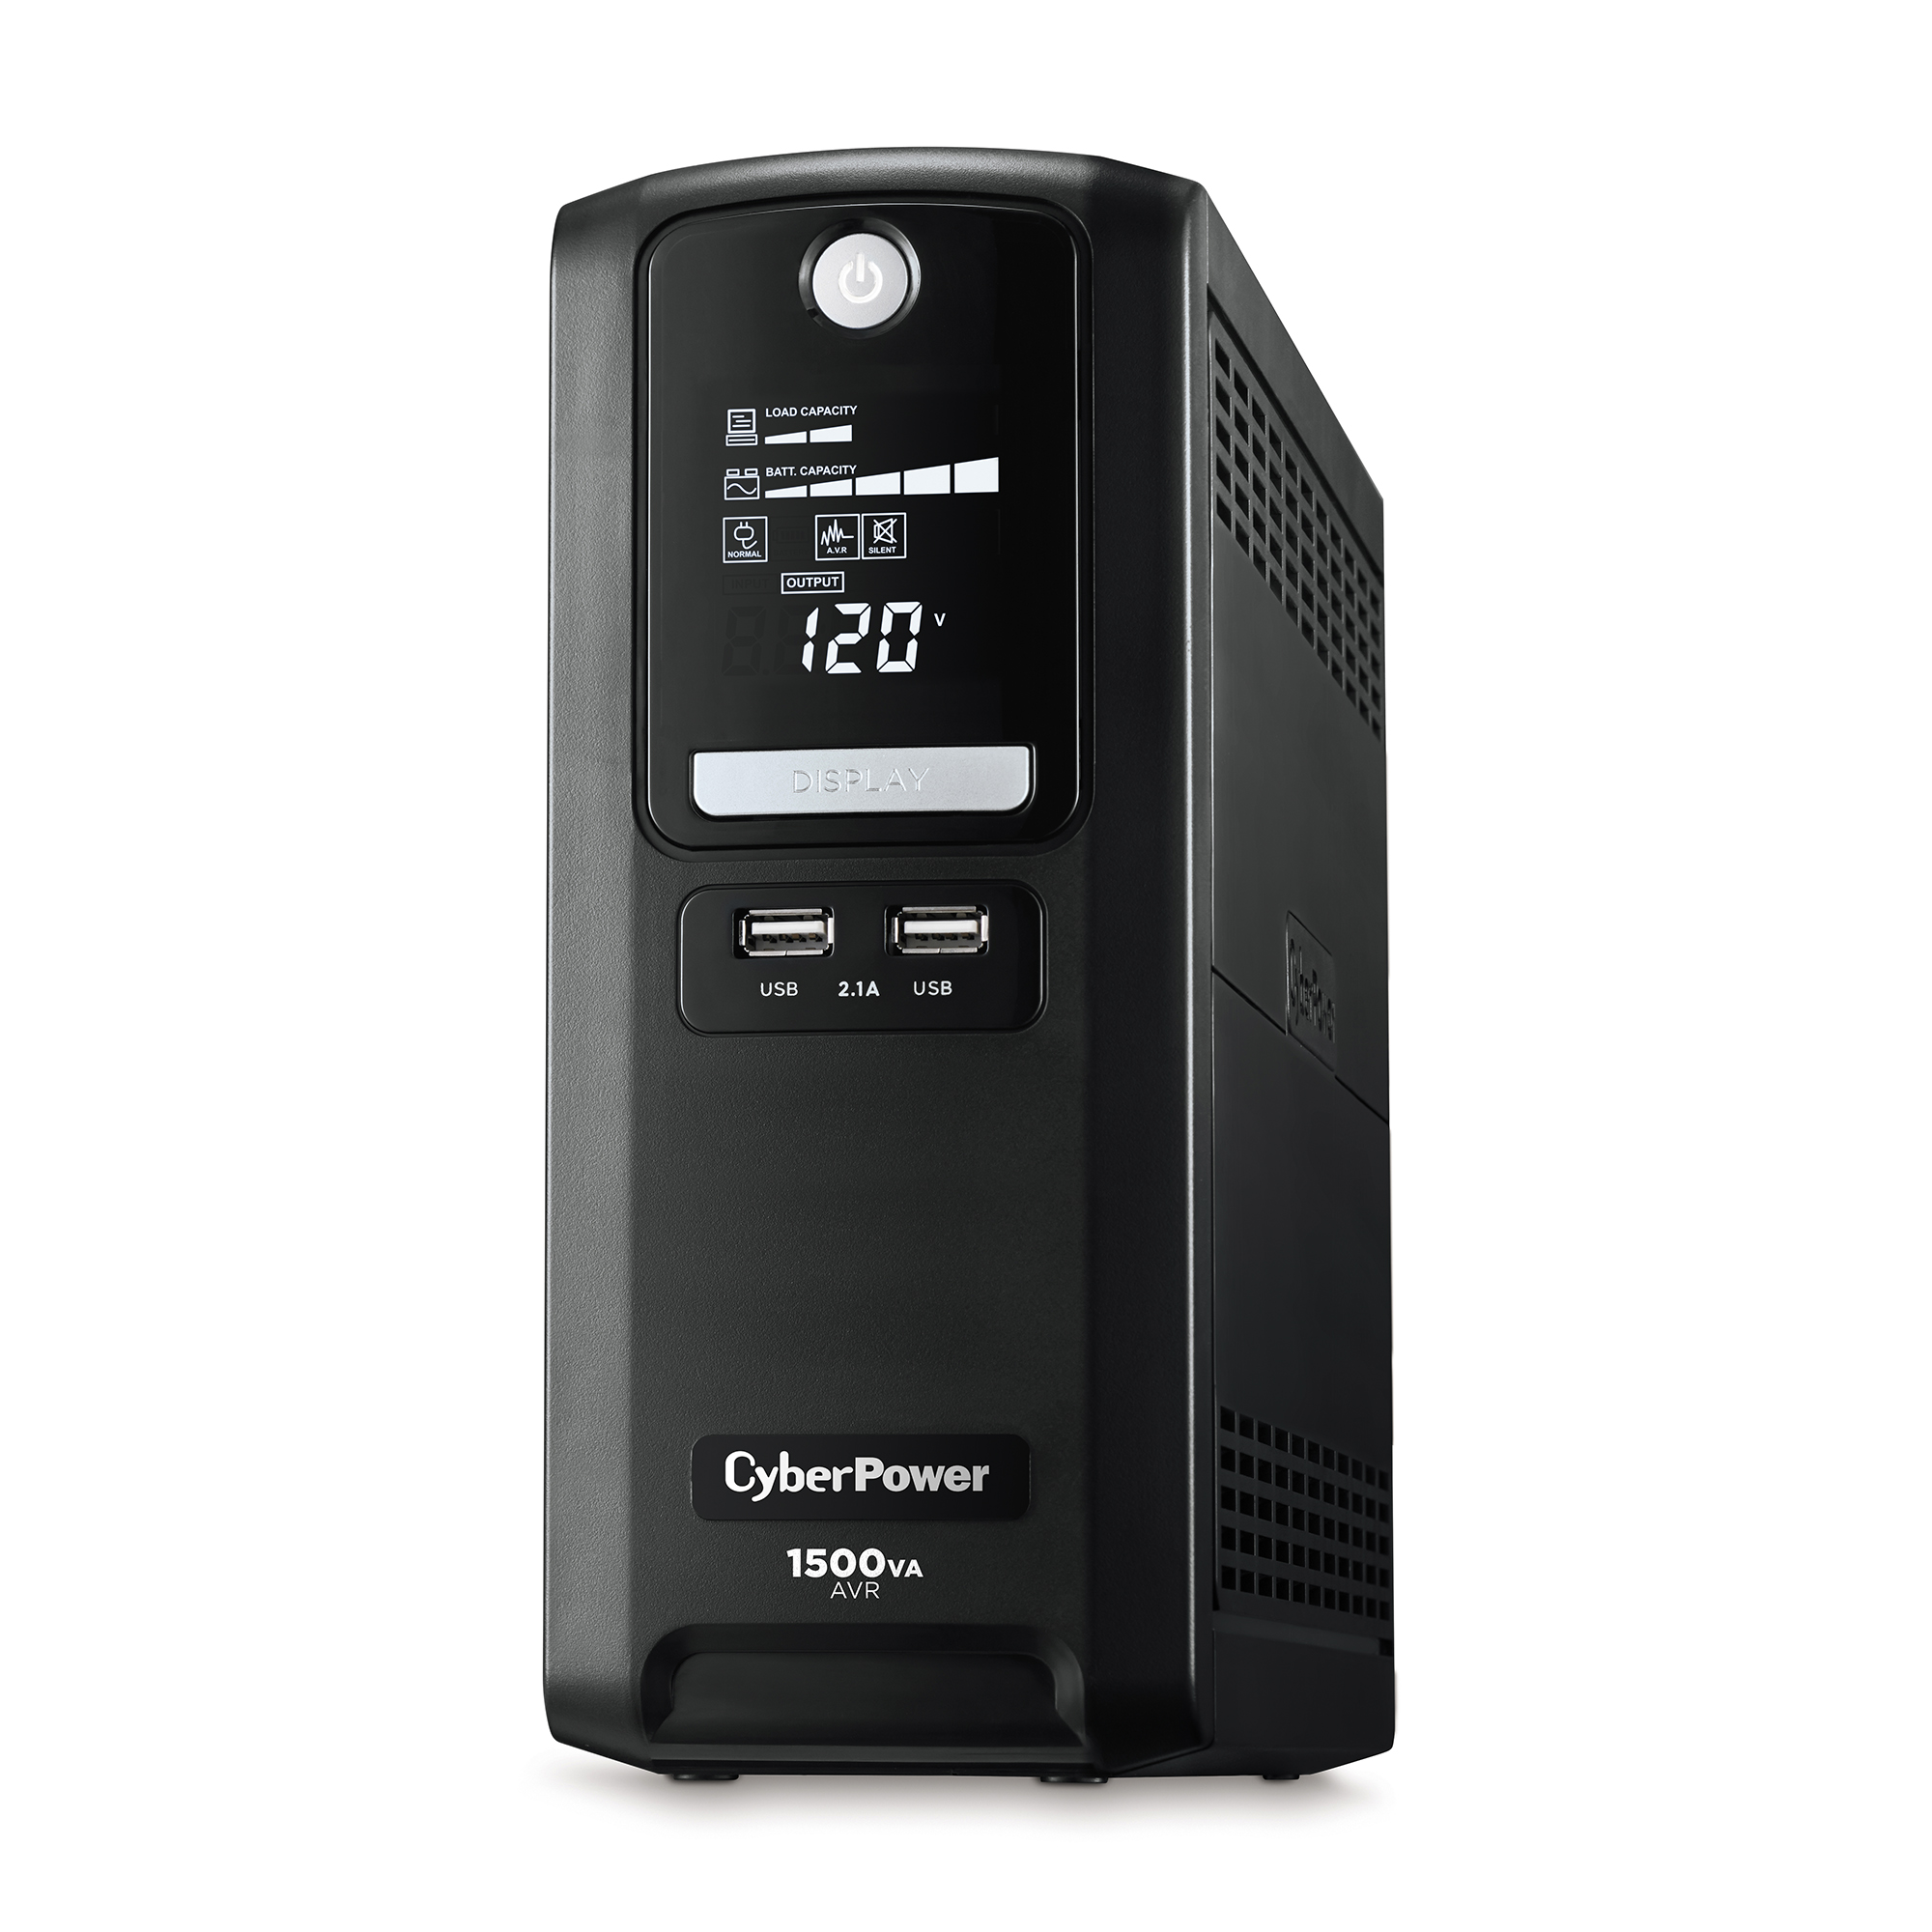
CyberPower LX1500GU
I purchased the CyberPower LX1500GU to replace an old APC BackUPS RS 1000 that was also retired due to old age. This CyberPower model met or exceeded the spec, and was within budget. The LX1500GU is rated for 900 Watts, and is currently supporting a 225 Watt load with an estimated runtime of 50 minutes. This UPS supports the main Windows PC and the Astron RS70A that powers all the 12 volt radio equipment.
CyberPower LX1500GU
APC BX1500M
Why not another CyberPower LX1500GU? Logical question. The simple answer is ‘apcupsd’ is currently running on my Ubuntu server, and I prefer to install another APC unit rather than have to research and reconfigure for something else. This new APC BX1500M will be plug and play with my current configuration once I change the ‘UPSNAME parameter.
APC BX1500M
This UPS device will support the Ubuntu Server, Router, switch, and one monitor.
There are some fine tutorials available for apcupsd, so I won’t go into it here. This is a quick and dirty version of my current apcupsd config:
apcupsd.conf v1.1
# for apcupsd release 3.14.14 (31 May 2016) – debian
UPSNAME apc700
UPSCABLE usb
UPSTYPE usb DEVICE /dev/usb/hiddev[0-15]
POLLTIME 60
LOCKFILE /var/lock
SCRIPTDIR /etc/apcupsd
PWRFAILDIR /etc/apcupsd
NOLOGINDIR /etc
#
# ======== Configuration parameters used during power failures ==========
#
ONBATTERYDELAY 6
BATTERYLEVEL 5
MINUTES 3
TIMEOUT 0
ANNOY 300
ANNOYDELAY 60
NOLOGON disable
KILLDELAY 0
#
# ==== Configuration statements for Network Information Server ====
#
NETSERVER on
NISIP 0.0.0.0
NISPORT 3551
EVENTSFILE /var/log/apcupsd.events
EVENTSFILEMAX 10
#
# ========== Configuration statements used if sharing =============
# a UPS with more than one machine
#
UPSCLASS standalone
UPSMODE disable
#
# ===== Configuration statements to control apcupsd system logging ========
#
STATTIME 0
STATFILE /var/log/apcupsd.status
LOGSTATS off
DATATIME 0
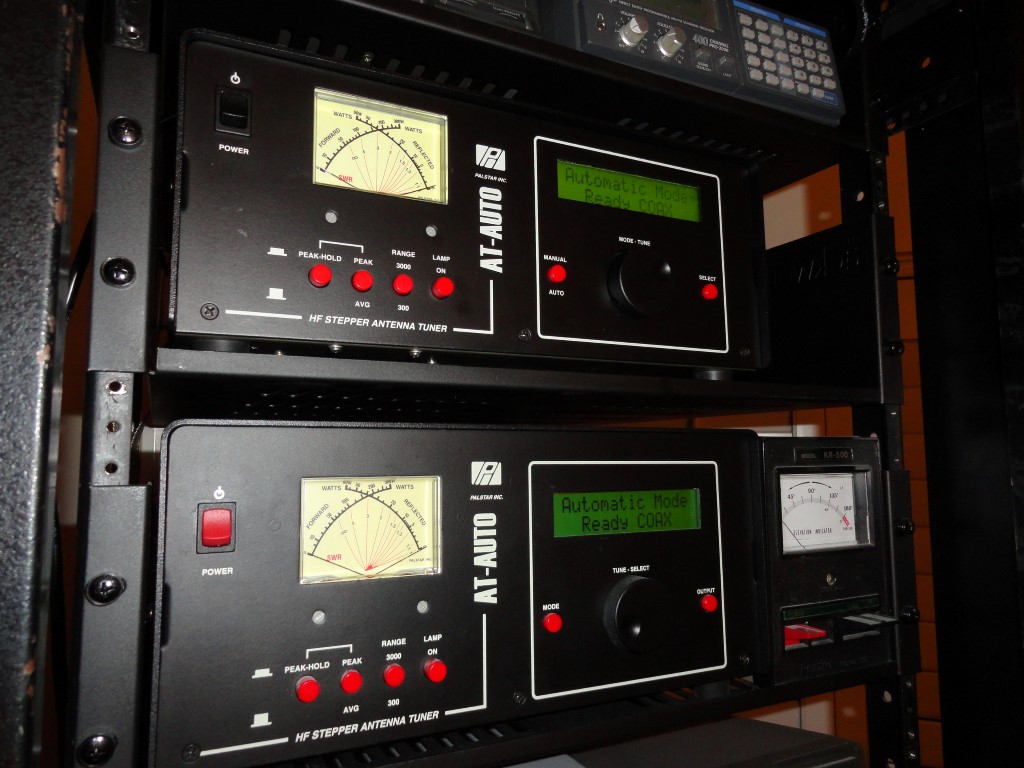
I control two Palstar AT-AUTO antenna tuners via the FlexRadio USB Cable Management function in SmartSDR.
Pair of Palstar AT-AUTO’s at K6HR
The FTDI USB RS-232 cables supply frequency data to other serial devices in the shack directly from the transceiver. Very slick!
When I first installed the cables I took the default settings and connected the 9 pin end of the cable to the AT-AUTO serial port. It was Plug and Play! Just like that, I had the tuners following the radio! This meant I could click anywhere on any band, and my antenna would be tuned almost instantly, and, without the need to TX a tuning carrier! That’s right, once ‘trained’ the tuners arrive at their match position before I press the PTT button!
It was the ‘almost instantly’ bit that got me…
In other words, the antennas were tuning great, but they weren’t tuning efficiently. I’ll explain. (or perhaps you’ve guessed it already!)
I have two antennas:
ANT1 – Mosley TA33JR Yagi – For use on frequencies 14mhz and higher.
ANT2 – 130ft Dipole (Height Compromised) – For use below 14mhz.
Each antenna has a dedicated AT-AUTO.
I quickly realized that as I changed frequency and/or band, both tuners were tuning both antennas to the same frequency. No good, because this also meant that when I changed from a low band to a high band, (where the tuning presets are at opposite ends of the AT-AUTO’s range), both tuners had to travel the entire length of the tuning cycle! Really bad!
I didn’t make sense to operate this way, so I decided it was time to RTFM.
I needed the ability to assign one cable to each tuner and send independent frequency data to each tuner. If I could do this, then each of the two tuners could operate within the proper (close together) tuning range, and neither tuner would ever have to move very far to find a match, and certainly never have to travel the entire length of the tuner range again. Thus resulting in the ‘instant’ tuning I was looking for.
USB CAT Cable ‘Source’ selection
Much to my delight FlexRadio USB Cable Management allows you to select the source of the cables frequency data from a number of very useful sources!
The sources are:
TX Slice – The cable will report the frequency of the slice receiver that holds the Transmit Indicator.
Active Slice – The cable will report the frequency of the active slice receiver (the slice that has the yellow cursor)
TX Panadapter – The cable will report the center frequency of the panadapter that contains the transmit slice
Specific Slice – The cable will report the frequency of the specified slice (A, B, C, D, E, F, G, H)
RX Antenna – The cable will report the frequency of the specified receive antenna (ANT1, ANT2, XVTR, RXA, RXB). Note: If multiple slices are on the same RX Antenna then the frequency of the last tuned slice will be reported.
TX Antenna – The cable will report the frequency of the specified transmit antenna (ANT1, ANT2, XVTR). Note: This frequency is only changed/reported when the TX Slice is connected to the specified antenna.
Tremendous Versatility!
The Flex 6300 Transceiver only has one Spectral Capture Unit.
From the SmartSDR Documentation:
Because the notion of a receiver is firmly established in both the amateur community and possibly the rest of the world, it seemed inappropriate to describe the functionality of a wide-band sampling system simply as a “receiver”. Instead, in the SmartSDR world there are one or more “Spectral Capture Units”, or SCUs, that are responsible for the collection of wide-band data from the RF spectrum.
The SCU components are: an antenna input, an optional set of receive pre-selectors, and an analog-to-digital converter (ADC). Each SCU in the radio system can be connected to only one antenna at a time, but due to the sampling architecture it may support multiple receivers and spectrum displays.
The SCU enables listening to multiple bands at the same time on the same antenna. A hardware platform with multiple SCUs such as the FLEX-6600, FLEX-6600M and FLEX-6700 allows for monitoring multiple bands on different antennas or the ability to perform more complex noise mitigation techniques that are available in multi-antenna systems.
To operate the tuners independently and efficiently, and, having only one SCU to work with, I decided to source each tuners data utilizing the ‘Specific Slice’ source. I assigned the Mosley’s AT-AUTO to respond only to data from Slice ‘A’, and the AT-AUTO for the dipole to respond only to Slice ‘B’ data.
Going forward, for the 6300, I will simply use Slice A for all frequencies 14 mhz and higher, and Slice B for all frequencies below 14 mhz.
I’m really looking forward to the addition of the 6700 and the tremendous versatility I will have at my disposal.
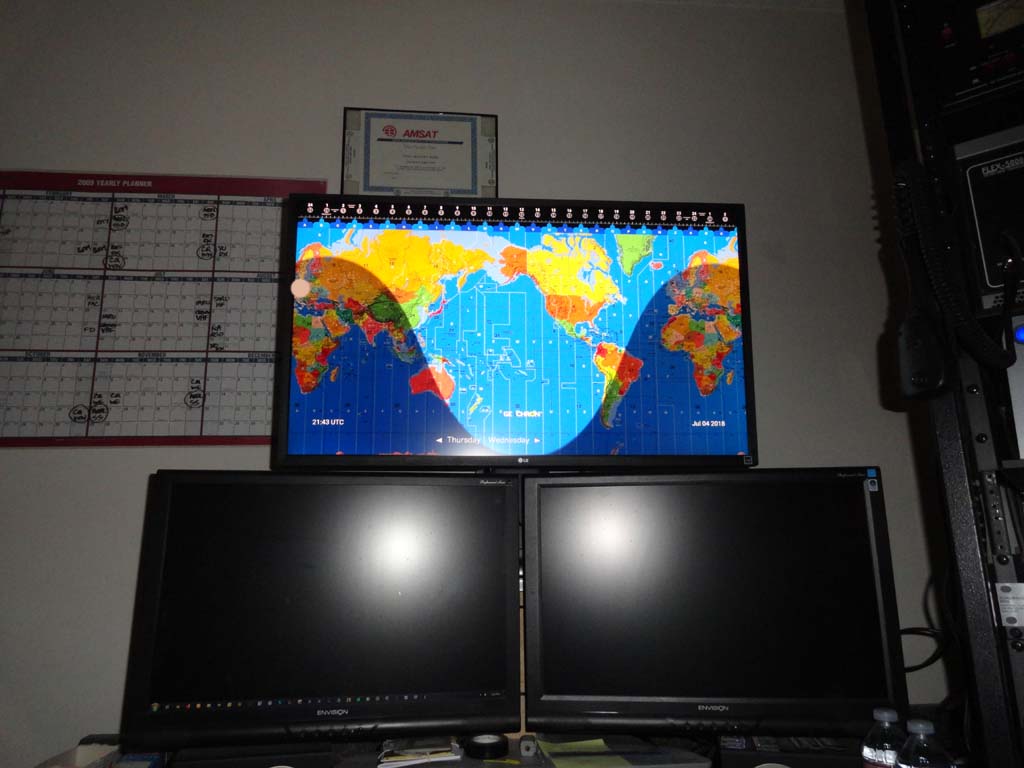
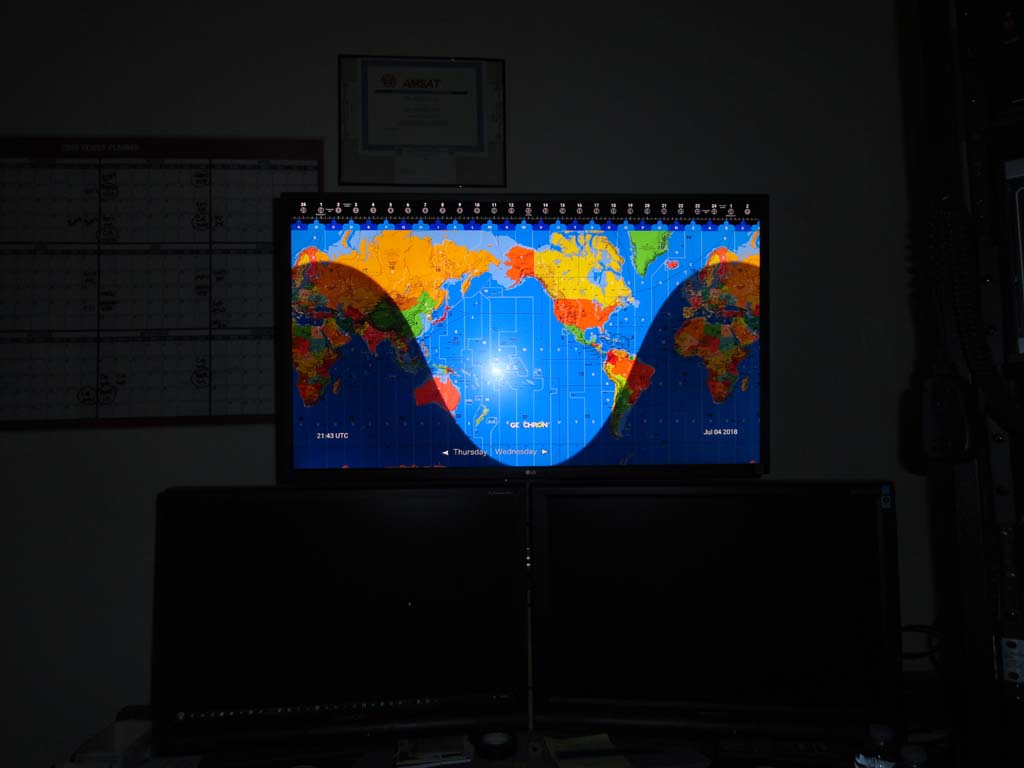
I am very happy with the latest addition to the shack! The world famous Geochron Digital 4K UHD clock. I plan to utilize the Geochron as a tool in learning how to work grey line propagation.
The digital version is a fraction of the price of the mechanical model, so I saw no reason to delay any further! $399 at my time of purchase.
I have it connected to my LG 32″ 4K monitor via HDMI and it looks amazing!
Geochron Digital 4K UHD
Geochron will show me everything I need to know to learn and work the grey line. I need contacts in zones 23 and 34 to complete WAZ on 20m and the Geochron is going to help get me there.
Geochron Digital 4K UHD @ K6HR
I intend to add a second, identical LG 4K monitor that will be dedicated to use with the Geochron. Of course I’m using the Amateur Radio map overlay, and have the Geochron connected to the internet via wifi for updates.
highly recommended
The Geochron is a compliment to any shack big or small. If you’re serious about chasing DX, the Geochron is a very useful tool.
From the Geochron website:
The Geochron Digital 4k UHD gives viewers beautiful displays of the Earth with the sunrise-sunset rendered in real-time through a small computer that plugs directly in to your TV via HDMI. The size of your display is only limited by the size of your TV, as you take in the terrestrial movement of the Earth’s orbit in sync with the Sun.
The Geochron Digital 4k UHD displays a full-featured Geochron World Clock on any 4k TV, with every mapset and lighting option available in our famous mechanical clock but at a fraction of the cost. Now in the digital format, users customize markers on the map, and recieve (with internet) real time updates.
Lifetime updates for five mapsets.
Live location of the International Space Station, updated every 15 seconds.
High Speed demonstration mode. One year in 15 seconds!
Eight Locations Pins with custom text names you can place anywhere on the map.
Static Overlays, showing:
Earth at Night
Major shipping routes (as of 05/2018)
Major flight routes (as of 05/2018)
Carbon Monoxide Pollution (new! as of 06/2018)
Digital Accuracy, and on-the-fly time adjustments to local time zones.
Multiple Views on the World in Real Time
With our easy-to-use on-screen menu, this Geochron has every mapset available: Earth Human, Earth Oceanic, Earth Topographical, a simple low resolution Geopolitical, and Ham Radio. Every map can be layered with humanity’s lights in the night, as seen from space.
Watch the sun rise over special locations, and mark them with customizable location pins. See the human expanse over the continents with lights reaching into the night.
Easy Setup
Although the algorithms behind the dynamic display are complex, the Geochron Digital 4k UHD is ready to go out of the box. It’s easy to set up and use with the provided remote control, and – with an internet connection – includes time and date configuration, firmware updates, and map updates.
I’ve finalized plans for this years hardware upgrades. After some careful consideration I’ve assembled my final list of RF hardware upgrades. 2018 has been a very busy year, but I’m finally to the point where I can devote more time and energy to the hobby side of things. I’m in the process of writing up a list of what I need to get done. I work best when I have my work sketched out and I can work through everything in logical steps. I find it helps me keep track of the details and saves me from re-work related delays.
Flex 6700
Telepost LP-500
LG 32UD59-B 32″ UHD 4K monitor with Ergo 45-295-026 (Monitor Arm)
APC BX1500M UPS
HDD upgrade to 500GB SSD
High Capacity HEPA Filter
W6LVP RX Loop #2
Comet CHA-250B Vertical HF Antenna
Additional Grounding and Ferrite requirements
Flex 6700
I mentioned this earlier in the year. The 6700 was the first item added to what would become the final list of new hardware. I’m getting a great deal from Flex on a “Certified Pre-Owned” 6700. Yeah, it costs a bit more than what we’ve seen some used units sell for recently, but having Flex service is well worth it.
Telepost LP-500
I’m on the waiting list and steadily moving up in the ranks! I’m hoping the fact that I’ll need 4 RF couplers doesn’t complicate the order. Hopefully they’ll have enough on hand as I arrive at the top of the list.
LG 32UD59-B
Now that I’ve had the LG UHD 4K monitor for a while, I’ve decided I really like it. I like it enough to add a second one. Complete with identical Ergo Articulating Arm Mount. I have a thing about keeping things somewhat symmetrical . So I usually always purchase monitors in pairs. This additional 32″ monitor will serve as the primary display for the GeoChron Digital 4K. It’s stunning! Wait until you see it! It’s gonna be killer!
APC BX1500M
This will complete the back-up power requirements for the shack. As previously mentioned the existing APC will be re-tasked.
EVO 860 500GB SSD Upgrade
I’m upgrading the shack PC to Windows 10, and I’ve decided to use a larger capacity SDD for the system drive, and re-purpose the existing SSD’s to be used on the web server hardware.
High Capacity HEPA Filter
One of my main goals is to finally eliminate the dust problem. During the rack build I was able to remove a tremendous amount of dust. Likewise, during the upgrade install, I will take further action. The plan is to use an air compressor to loosen, and then collect the dust with the HEPA. Rather than attempt to loosen all the remaining dust at once, I plan to do it in installments to avoid getting choked, or the filter getting clogged etc.
Comet CHA-250B Vertical / W6LVP Loop
On the recommendation of Ron, WB6IAG, I am installing a Comet HF vertical. This antenna will add some flexibility to the station RX. I am also adding a second W6LVP Loop antenna, and putting it, and the existing loop, on rotators! How’s that for an RX improvement!
Finishing Touches!
RF Hardware Upgrades
Of course the new gear all needs to be tied into the ground bar, and have ferrite’s applied to both ends of all the new cables. Perhaps the last finishing touch with be the replacement of the ugly cardboard above the air conditioner in the window! I’ll cut a custom fit a plexi-glass insert to close up the window properly once and for all!
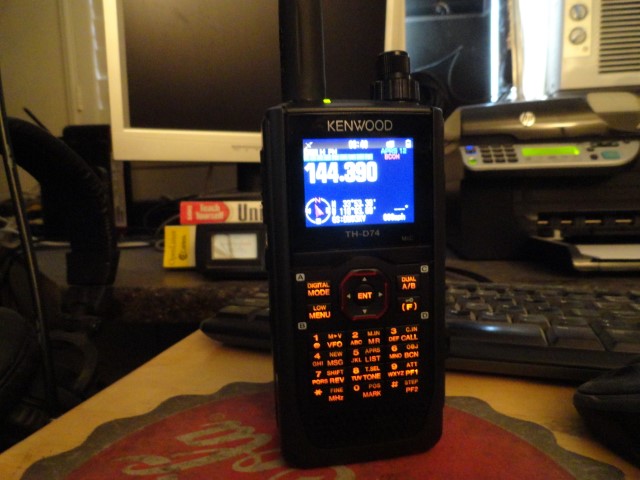
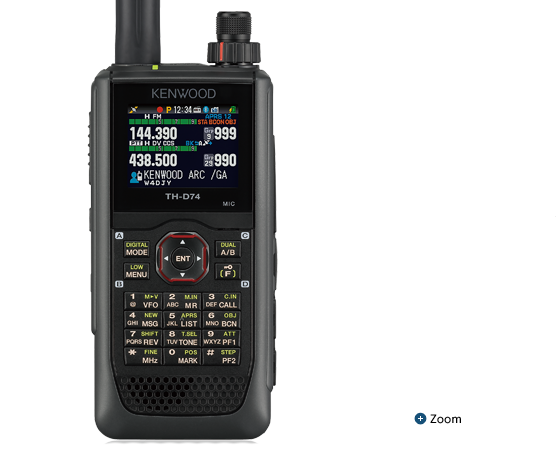
Last Minute Addition! Kenwood TH-D74A
The Kenwood TH-D74A is a D-STAR transceiver. It is packed with amazing features. And….it comes complete with a learning curve! I recently became interested in D-STAR after doing some research on its capabilities.
I was in the market for an HT and decided to take a look at what the “Big 3” were offering. My attention was drawn to the D-STAR Network after stumbling into a D-STAR video featuring the ICOM ID-51A. After a little more research it became apparent the best choice for me would be the D-STAR Kenwood TH-D74A.
Kenwood TH-D74A – Tri-Band APRS/GPS/D-STAR
First rule of D-STAR: You must register!
I registered through HRO where I purchased the radio, and within a business day my registration was working. The D-STAR network checks for a valid callsign registration before allowing access. So you can’t work any D-STAR without the validated registration. It took less than 5 minutes to enter the basic required info via the web. I entered my info on a weekend, and it was working after the following business day.
D-STAR Gateways
The ‘gateway’ function was what really got me going on D-STAR. The digital repeaters have an internet gateway function that allows for connection to remote D-STAR repeaters and ‘reflectors’ around the world. Count me in! This is a must have capability at K6HR.
Finding my local digital repeaters was simple, and I quickly determined which repeaters I could access. The GPS feature enables you to find the local repeaters with the press of a button from a built-in database. Pretty slick!
However…
I also quickly learned that the local D-STAR repeaters, although capable of gateway connections, do not necessarily permit them! At least, not to casual users. I can see that the best local repeater is always linked to a certain reflector. When I attempt to change the reflector, I get an error icon.
It didn’t take long to realize it is poor etiquette to show up on a repeater and change the reflector that many folks are monitoring! Bad idea. Now what?
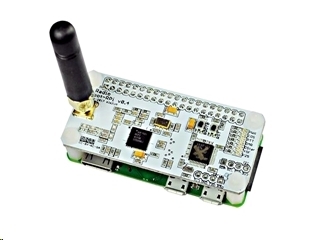
And the answer is…DVAP
No Problem. I just need to be a D-STAR Gateway!
There’s a gizmo for that! What I need is a Digital Voice Access Point or DVAP. The DVAP is an internet gateway interface that can be accessed via UHF simplex. Through the DVAP, I will have my own D-STAR gateway functionality. I wouldn’t rule out a full blown D-STAR repeater sometime in the future, but for now the simplex UHF DVAP will get the job done.
Supports DMR, P-25, D-Star, System Fusion and NXDN
Onboard LEDs to show status (Tx, Rx, PTT, Mode)
Up to 10mW RF power
SMA antenna connector, UHF antenna included
Mounts cleanly on all current Raspberry Pi’s including the Pi Zero WH
Works on ODROID boards
The firmware is pre-loaded and is easily upgraded via software.
Connections for Nextion LCD display and I2C displays
1 Year Warranty
Open source firmware (MMDVM) and board design
Open source 3D printable case available
144 MHz, 220MHz and 900MHz versions to be released at a later date
I am very pleased with the D-STAR Kenwood TH-D74A, and with the overall D-STAR experience thus far, although I am still learning the radio and studying the manual. The APRS performance is also outstanding. I’ve only scratched the surface of this radio’s capability.
The programming of the ZUM hotspot looks pretty straightforward. The DVAP will be included in the 2018 radio hardware upgrade taking place next month.
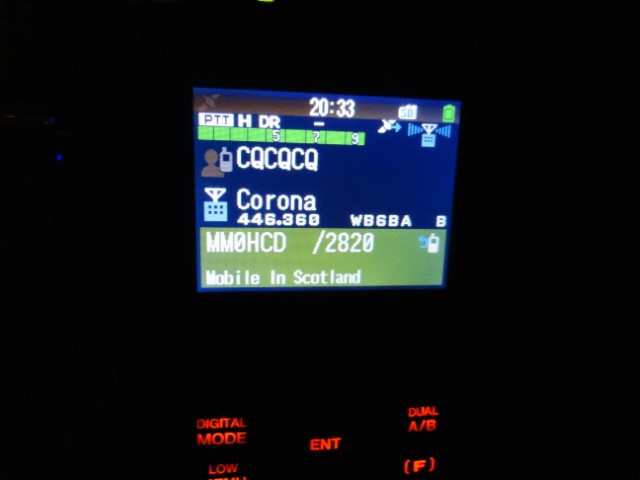
QSO w/ Scotland via local D-STAR repeater
Pictured above: A QSO in progress with a mobile station in Scotland. He has a multimode hotspot in his vehicle so he can work the world on his way to work!
D-STAR is an exciting new facet of amateur radio here in the K6HR shack!
All the orders have been placed, and the new 2018 equipment upgrades are arriving. Some items have arrived already! The ZUMSpot has been assembled, and will be configured for use sometime next week. The FlexRadio Maestro is already in service. The Maestro was simple to configure and was on the air in minutes.
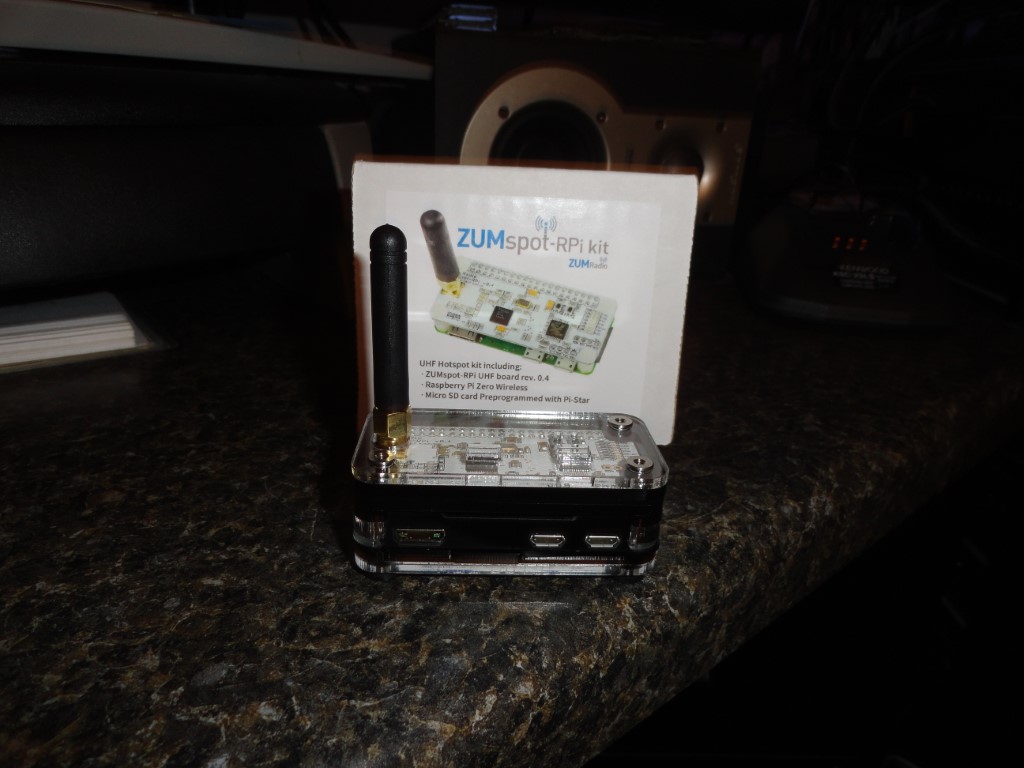
ZUMSpot Multimode UHF Hot Spot
The ZUMSpot pictured in the optional plastic case
I ordered the optional plastic case for the ZUMSpot. It consists of a number of flat plastic parts that are stacked during assembly. The case parts included an exploded view illustration showing how to stack all the parts. I have not yet received the the Mini HDMI adapter, so I’ll wait to configure it until next week.
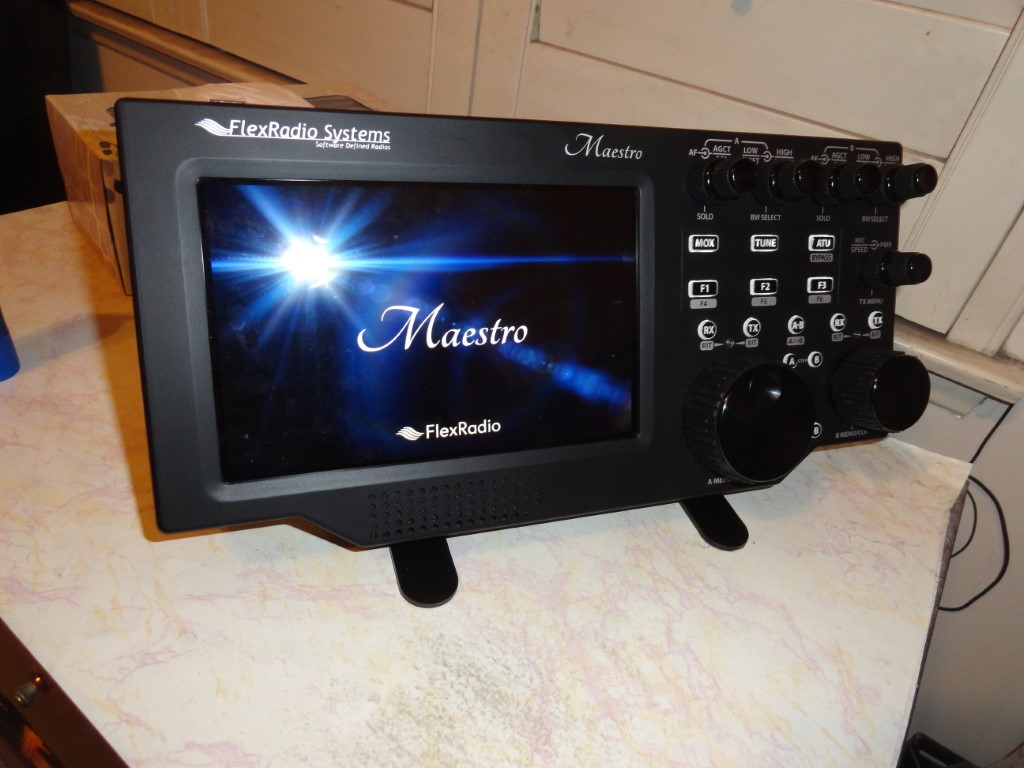
FlexRadio Maestro
Well, it’s bigger than I expected. The touchscreen is fantastic. It looks amazing. Set up was as easy as entering my wifi password. Did I mention the big beautiful screen?
2018 Equipment Upgrade: FlexRadio Maestro
The Maestro replaces a Gigabyte Brix Wireless Mini-PC running SSDR under Windows 7, using a mouse to operate. The Brix wifi left a lot to be desired. It would often have dropouts that distorted the audio, and would lose it’s connection to the radio fairly often, in spite of being just one room away from the router.
I considered a new router, but decided to see how the Maestro performed first. At this point, on it’s ‘maiden voyage’ last night, it held a solid connection for 12+ hours. A new record! I don’t anticipate any problems, it looks like my little remote setup just went to the big time!
More On The Way
The FlexRadio 6700 is ready to be shipped as soon as the weather situation in S. Carolina improves. The 6700 will ship from Myrtle Beach SC early next week once the area recovers after hurricane Florence.
The balance of the new gear has shipped from the east coast dealer. If all goes as planned I should be able to start installation the week after next.