Rack Mounting Project

2018 Equipment Upgrades Are Arriving!

All the orders have been placed, and the new 2018 equipment upgrades are arriving. Some items have arrived already! The ZUMSpot has been assembled, and will be configured for use sometime next week. The FlexRadio Maestro is already in service. The Maestro was simple to configure and was on the air in minutes.

ZUMSpot Multimode UHF Hot Spot

2018 Equipment Upgrades Are Arriving
The ZUMSpot pictured in the optional plastic case

I ordered the optional plastic case for the ZUMSpot. It consists of a number of flat plastic parts that are stacked during assembly. The case parts included an exploded view illustration showing how to stack all the parts. I have not yet received the the Mini HDMI adapter, so I’ll wait to configure it until next week.

FlexRadio Maestro

Well, it’s bigger than I expected. The touchscreen is fantastic. It looks amazing. Set up was as easy as entering my wifi password. Did I mention the big beautiful screen?

2018 Equipment Upgrades Are Arriving
2018 Equipment Upgrade: FlexRadio Maestro

The Maestro replaces a Gigabyte Brix Wireless Mini-PC running SSDR under Windows 7, using a mouse to operate. The Brix wifi left a lot to be desired. It would often have dropouts that distorted the audio, and would lose it’s connection to the radio fairly often, in spite of being just one room away from the router.

I considered a new router, but decided to see how the Maestro performed first. At this point, on it’s ‘maiden voyage’ last night, it held a solid connection for 12+ hours. A new record! I don’t anticipate any problems, it looks like my little remote setup just went to the big time!

More On The Way

The FlexRadio 6700 is ready to be shipped as soon as the weather situation in S. Carolina improves. The 6700 will ship from Myrtle Beach SC early next week once the area recovers after hurricane Florence.

The balance of the new gear has shipped from the east coast dealer. If all goes as planned I should be able to start installation the week after next.

Back To The Front


Dust Mitigation

Dust Mitigation

Finally, some progress in my battle against the dust!

The bulk of the 2018 hardware upgrades are scheduled to arrive next week. In preparation I have started my planned dust mitigation process. In previous posts I described the problem I encountered during the tear down last year. I was literally choking on dust. Not good for me, or the ham shack.

dust mitigation 2018
This ought to get the dust flying!

I’m using the air compressor to get as much of the dust airborne as possible. The ceiling in the shack has a rough stucco type finish, perfect for trapping dust. I was convinced that years of accumulation was more or less impacted in the ceiling surface. I was right. Once I hit it with the air gun, tons of dust was released.

With my face mask firmly in place I blew off the entire ceiling, then every surface that was practical after that.

Set It On High!

Here is my second weapon against the dust…

High Capacity HEPA Filter

This high capacity HEPA filter will easily scrub all the dust out of the air. I have it running on the highest setting while blowing the dust around. I’m fairly certain it will take a few more air gun sessions to get everything clean once and for all. Once I’m satisfied I’ve collected as much dust as possible, I will leave the HEPA filter running on low speed 24/7.

The shack will go from dust bin to clean room just in time for all the 2018 hardware upgrades.

Back To The Front

Now That’s What I Call A Snap On Ferrite!

Now That’s What I Call a Ferrite!

The DX Engineering order arrived today, and I was delighted to see the new and improved .5” id Mix 31 snap on ferrite!

First DXE Ferrite (L) vs. New DXE Snap On Ferrite (R)

Apparently the buyers at DXE are always looking for better deals on better materials. This is a prime example. Pictured on the left is a sample of the .5″ id mix 31 ferrite that I received in my first order from DXE, on the right, is the new version received today. Both are pictured on LMR-400 coax.

DX Engineering .5 id Mix 31 Snap On Ferrite

Mix 31 snap on ferrites are a must have to keep the equipment rack free of stray RF. All the new 2018 RF Hardware Upgrades will be interconnected using LMR-400 UF coax jumpers with these snap on ferrites on each end.

Back to the front

FlexRadio 6700 Installation

FlexRadio 6700 Installation Begins

The 6700 radio hardware had shipped, so it was time to make room for the 6700 and the other items that need to be installed in the rack. The FlexRadio 6700 installation began with dust mitigation.

Satisfied with the results of the dust removal, I began the hardware installation with plans to be completed before the CQWW DX SSB Contest on October 27.

  • Pull Server PC, move to top of rack
  • Move RX1608 mixer and reconnect all audio
  • Install latest Ubuntu on 500GB SSD w/Intel i5-4460 and re-mount
  • Install Windows 10 on 1TB SSD w/Intel i7 K-875 and re-mount
  • Move PRO-2500 Power Distro
  • Install rack shelf for Buffalo NAS
  • Move shelf for 6700 / LP-500
  • Install and configure UPS Back-Up Battery #2
  • Install Geochron 4K UHD
  • Mount USB Hub and Router
With the PC shuffle “hard work” out of the way, I setup the final mounting shelves.

PC Hardware Shuffle

FlexRadio 6700 Installation
The Server PC was pulled to make room for everything else

This is the reason you rackmount! Super easy removal and relocation of equipment. The PC on the bottom is the Intel i5 build for the new Ubuntu 18.04 Server. Once I could see Ubuntu installed OK, I buttoned up that machine and moved the top PC down on top of it. On this i7 machine I installed Windows 10 on a 1TB SSD, and left the previous OS (Windows 7 RAID Array) in place so I could mount the drives just in case. Later on, this would prove to be very useful.

Audio

Once both PC’s were running and tested, I mounted and wired the Behringer RX1602 for all the audio: 6700/6300/5000/PC.

FlexRadio 6700 Installation
The Behringer RX1602 Mixer handles all the shack audio with inputs to spare!

The RX1602 mixer provides a MON output that I have connected to the 6700 BAL audio input. This signal path could be used to feed PC audio to the transceiver for TX.

The PRO-2500 Power Strip was moved up top between the AT-AUTO and the packet radio gear.

The last rack space!

To obtain the last rack space needed (to accommodate the LP-500) I moved the Monster PRO-2500 power distribution strip up top under the packet radio gear. The packet gear is now utilizing the “fan space” in the top of the rack. Just enough room to slip the power strip under it.

I now have the 11 spaces I need in the perfect ergonomic rack position!

Prime Real Estate: Future home of an LP-500, Flex 6700, Flex 6300 and Buffalo NAS.

Lucky for me, I only needed to move a few things around before I was ready to go. As part of the process I tied all the new hardware into the station ground bus, and installed another 30 snap-on ferrites.

It made sense to mount the Numark Production Hub to the side of the rack for easy access to USB ports and some extra AC outlets.

Plenty of USB ports and AC outlets available at the operating position.

At the same time I decided to tie wrap the router to the other side of the rack in an effort to simplify things.

FlexRadio 6700 Installation
Easier access to the router

The FlexRadio 6700 Installed!

The Flex 6700 is up and running @ K6HR

The FlexRadio 6700 has taken it’s place in the K6HR shack! The FlexRadio 6700 installed without a hitch. I’ve taken it through high power testing with no problems found, and everything appears to be working as expected. I have pushed the rack back into the corner about half way and will make any final adjustments before pushing it all the back.

Now completely integrated, the Flex 6700, Expert 1K-FA amplifier, and (both) AT-AUTO tuners are working flawlessly together. I’ve trained the tuners (and the 1K-FA tuner) for each antenna on every band. Each FlexRadio SCU now has its own dedicated amplifier, auto-tuner and antenna. I’ve set it up where SCU #1 is connected to the Mosley TA33JR for frequencies 14 mhz and above, and SCU #2 is connected to my ‘height compromised’ 130ft dipole for all bands below 14 mhz.

When one radio (SCU) is active on any band, the second radio (SCU) is connected to a W6LVP wideband RX Loop antenna. It’s a fully automated SO2R contest station. It’s now a 1,000 watt radio. Now let’s see if the operator can live up to his capabilities!

Back to the front

D-STAR Hot Spot

D-STAR Hot Spot

Today I configured and installed the “ZUMSpot”. The ZumSpot is a pre-packaged Raspberry Pi Zero UHF Wireless multimode hot spot running the Pi-Star Digital Voice Dashboard. This is a Multi-Mode Hot Spot that supports several digital modes. K6HR will be setup specifically for D-STAR. My own personal D-STAR Hot Spot!

K6HR UHF D-STAR Hot Spot
ZumSpot Pi-Zero Multimode UHF Hot Spot @ K6HR

I’m certainly no D-STAR expert, more like a D-STAR noob. So I went to the setup video and followed along. This video made setting up the Pi-Star software and Kenwood TH-D74 a relatively easy task.

From the web:

ZUMspot Kit Features:

  • High performance 32-bit ARM processor
  • ZUMspot Board Fully Assembled And Tested
  • Supports DMR, P-25, D-Star, System Fusion and NXDN
  • Onboard LEDs to show status (Tx, Rx, PTT, Mode)
  • Up to 10mW RF power
  • SMA antenna connector, UHF antenna included
  • Mounts cleanly on all current Raspberry Pi’s including the Pi Zero WH
  • Works on ODROID boards
  • The firmware is pre-loaded and is easily upgraded via software.
  • Connections for Nextion LCD display and I2C displays
  • 1 Year Warranty
  • Open source firmware (MMDVM) and board design
  • Open source 3D printable case available
  • 144 MHz, 220MHz and 900MHz versions to be released at a later date

The ZUMspot Kit Package Includes:

  • ZUMspot Pi UHF Board
  • Pi Zero WH (Wireless With Header)
  • UHF Antenna
  • Nylon Standoffs
  • Pre-Imaged 16 GB MicroSD Card with Pi-Star Software
D-STAR Hot Spot
Pi-Star up and running at K6HR as a D-STAR Hot Spot
D-STAR Hot Spot
Kenwood TH-D74 linked to the ZUMSpot UHF hot spot!

I quickly realized I would not have the ability to change reflectors via local repeaters, so I decided on the hot spot. Now I will be able to connect to reflectors directly. Since I have no D-STAR experience whatsoever, I’ll spend some time listening around first.

I’m certain everything is configured correctly, however on my first night of D-STAR…there was nothing heard on REF030C. I’m sure it will be active during the daytime hours! Hi!

UPDATE: It works! With the help of Toshen, KE0FHS, I was able to find an omission in my D-STAR registration details. After making the correction everything started working. I expect D-STAR will be very interesting! I may even consider other digital mode radios, since the Pi Zero is multimode.

This is a wickedly cool little device! Hats off to the Pi-Star bunch!

Back To The Front

The Power of FlexRadio Profiles

Today, I used the Flex 6700/SPE 1K-FA combo for the first time (outside of testing) in the CQWW SSB Contest. During the first hour of the contest I had a problem with the amplifier not changing inputs automatically and/or being on the wrong input altogether.  I was certain all the hardware was wired correctly, as that had been proven during electrical testing. I started thinking I was having an RFI problem. After some investigation, I found it was not a wiring or an RFI problem at all, but more a problem of how the wiring was being told to behave. I’ll try to explain. Lucky for me, a quick course in the power of FlexRadio profiles would be all I would need to get everything working perfectly.

A Fully Automated SO2R Station

The object was to have the Flex 6700’s two  Spectral Capture Units (SCU’s) connected to the amplifier in Single Operator 2 Radio (SO2R) configuration. The plan was to dedicate one SCU to the Mosley antenna, and the second SCU to my 130 ft height compromised dipole antenna. The amplifier was programmed to select the Mosley for all bands 14 mhz and above, and to select the dipole for all bands below 14 mhz. Finally, each antenna would be tuned by its own dedicated (and CAT controlled) AT-AUTO.

What the heck?

I use the DXLab Suite of programs. DXL is great software that had worked seamlessly with the Flex 6000 series radios up to this point. I realized that some of the problems I saw occurred after clicking on DX spots that caused the radio to enter into what looked like diversity receive mode (not split), while at the same time, the amp ended up on the wrong input, and DXL was losing its connection to the radio.

Getting to the bottom of it…

The major issue was the amplifier no longer switching inputs automatically, so I decided to start there. The SPE 1K-FA Linear Amplifier is designed specifically for SO2R. At the minimum, the amplifier senses RF and changes the inputs automatically that way. So why was that not even happening?

I knew I had the radio TX1 output connected to the amp input #1 and radio TX2 output connected to amp input #2, so that’s not it…or is it?

In the 6700 radio setup tab I could see both TX outputs were enabled…what the heck. Then it hit me. Of course, both radio TX outputs were keying at the same time. Therefore both sides of the amp were being told they were in transmit at the same time, and the input could not switch, or it switched incorrectly. I proved this by disabling one of the USB CAT cables. Great! I found the problem! Right?

Almost.

While the amp input switching problem was going on, I also noticed that the transmit and microphone profiles kept changing, and, they were changing to profiles created by the radios previous owner. Another level of “what the heck” to deal with… None of it made any sense, so I decided it was time to read the manual!

In the meantime I created a workaround in DXL and connected to the radio as a “Kenwood” using a COM port (on the ports tab) in order to get the frequency information into the logging program. I worked through the remainder of the contest without issue, albeit not in a working SO2R configuration.

Understanding the problem

I realized that I needed the TX1 relay to be activated ONLY when the radio was requesting ANT 1, and likewise with the TX2 relay when operating on bands covered by the dipole. Since part of the problem involved the changing profiles, it was time to read the manual on profiles.

The first paragraph was all I needed to see, and everything suddenly started to come together.

From the SmartSDR v2 Manual:

Transmit profiles are linked to the TX Antenna setting in the transmit slice. When the antenna used by the transmit slice is changed, the Transmit profile associated with the new antenna selection is invoked. For example:

  1. Slice A is the transmit slice. TX ANT is ANT1
  2. Slice B is NOT the transmit slice. TX ANT is ANT2
  3. Load SO2R_TX1 Transmit profile. (This Transmit profile is now automatically linked to ANT1)
  4. Set Slice B as the transmit slice.
  5. Load SO2R_TX2 Transmit profile. (This Transmit profile is now automatically linked to ANT2)
  6. Set Slice A as the transmit slice. (This loads the SO2R_TX1 Transmit profile)
  7. Change Slice A TX ANT to ANT2. (This loads the SO2R_TX2 Transmit profile)

To associate a Transmit profile with a TX antenna, select the TX Antenna you wish to associate in the transmit slice, then load or save a Transmit profile using the Profile Manager, or select an existing Transmit profile using the drop-down menu.

This explained everything!

Of course the SO2R_TX1 profile only had the TX1 relay enabled, and the SO2R_TX2, only the TX2 relay! Problem solved! Almost…

FlexRadio USB Cable: Data Source

I had originally set the Flex USB cables to send frequency data from slice A and B to amplifier inputs #1 and 2 respectively. This seemed to work OK for sending frequency data to the auto-tuners, so I set the USB cables to the amplifier the same way, to use the “slice” as the source of the frequency data. This worked OK until I added a third (or more) slice.

I took a second look at the source menu for the USB cables, and I found the perfect solution:

The sources are:

  • TX Slice – The cable will report the frequency of the slice receiver that    holds the Transmit Indicator.
  • Active Slice – The cable will report the frequency of the active slice receiver (the slice that has the yellow cursor).
  • TX Panadapter – The cable will report the center frequency of the panadapter that contains the transmit slice
  • Specific Slice – The cable will report the frequency of the specified slice (A, B, C, D, E, F, G, H)
  • RX Antenna – The cable will report the frequency of the specified receive antenna (ANT1, ANT2, XVTR, RXA, RXB).
  • TX Antenna – The cable will report the frequency of the specified transmit antenna (ANT1, ANT2, XVTR). Note: This frequency is only changed/reported when the TX Slice is connected to the specified antenna.

By choosing “TX Antenna” as the source for the USB cables connected to the amplifier, any one, of any number of open slices, could now connect to the correct antenna!

Once I realized the benefit of this new data source, I set the auto-tuner USB cables to “TX Antenna” as well. The switching and tuning of the amplifier, and the auto-tuners is now 100% functional from any slice on any band, and guarantees that the correct antenna will be selected and pre-tuned every time, effectively eliminating operator error.

Any slice that is designated as the “TX” slice will get the correct antenna and amplifier settings every time! While operating, I can temporarily switch TX designation to a slice on the other antenna, have it tune, then reassign the TX back to the original slice and I have the second band pre-tuned for SO2R. Pretty slick!

The only operating ‘delay’ I see now, could possibly occur, if the AT-AUTO’s were requested to change bands when the bands were far apart in the tuning range at the time of the request. e.g. the OP requests the 20m antenna be tuned to a frequency below 20m, like 40m. While this can be done, it is very unlikely to occur in practice.

Re-tuning within the same band is practically instantaneous, and long band change tuning delays are few and far between when employing proper operating technique. Furthermore, I employ two AT-AUTO’s, one for each antenna, thus greatly lessening the chances a long band change re-tune would ever be required. Both antennas are continuously tuned and each tuner responds nearly instantly when operated within the predetermined tuning ranges.

Once I had all this working, I went through every saved profile and created, edited, and saved new transmit profiles within each, so that the correct keying occurs every time.

Finally! The sweet sound of full station automation!

Absolutely Brilliant!

The Flex engineers are getting a round of applause at K6HR today. What an incredible effort they put together to create this amazing product! For the serious amateur radio operator….indeed.

P.S. DXL Commander 13.7.9 and SSDR v 2.4.9

I checked and a fix was being discussed to correct the issue that’s causing DXL Commander to lose its connection to the Flex 6xxx radio. Once this bug fix is applied, I’ll go back to DX Lab. I can see DXL’s going to be great with the 6700 once this little problem gets sorted!

Back To The Front…

2019 Hardware Upgrades

2019 Hardware Upgrades

After working with the Flex 6700 for about a month, I must say, I’m really impressed with how quiet the receiver is. Now that I’ve had the experience of using the contest grade filtering, and all the other great features, it just makes sense to upgrade my 6300 to a 6500 (which I will likely dedicate to digital modes). It’s never too early to begin planning for my 2019 hardware upgrades.

My Only Flex Disappointment

I’m going to ‘take a real shellacking’ on the sale of my 6300. I purchased it from Flex before the model 6400 price was announced. The day after the 6400 was introduced at $1999, the value of 6300’s went down the drain. I paid the top dollar price for mine in September 2015. Ouch!

I know, no sense crying over spilled milk. After all, that’s how the cookie crumbles. It turned out, after some wheeling and dealing, and a stroke of luck, I was able to achieve my 2018 hardware upgrade goal under budget, which is great news for my 2019 planning!

Flex 6500: Dedicated Digital Mode Radio

The contest station is complete, so my 2019 plan is to put together a new 24/7 digital station using a dedicated 6500 radio. This new setup will have its own antenna, and PC, and work independently along side the contest station.

I don’t have room for another HF yagi antenna, so I am considering a vertical. As I mentioned in an earlier post, I heard about the Comet CHA-250B HF vertical on one of the local repeaters. It fits the bill, and should be easily tuned with the 6500’s internal tuner.

I’ve heard a lot about the FT8 mode lately and it sounds like something I would like to have running here. I could have up to four HF digital modes running 24/7.

To get the plan rolling I must first:

  • Sell the 6300
  • Purchase  a 6500, CHA-250B vertical, and 100ft of LMR-400UF

Back To The Front

Flex 6700 Frequency Drifting!

The Last Thing I Expected!

Last night I started setting up WSJT-X to get FT8 up and running. After some time spent sorting out the missing “DAX Audio TX” device, it looked like the software was configured correctly. I’ve setup WSJT-X before and the installation has always been straightforward. Rig control and audio both connected OK. However, it could not decode a single bit. This is odd, since I’ve never had any problems with WSJT before, and this was a routine install of the current version. I installed the Meinberg NTP suite to make sure it was not a time problem. After zooming in on the panadapter I noticed the Flex 6700 frequency drifting!

Flex 6700 Frequency Drift

I submitted a Help Desk ticket and was immediately contacted by Eric at Flex. Hopefully this can be taken care of quickly.  It may not be typical Flex response time, but the last radio I sent to Flex for service was completed in one day!

From what I’ve read in the FRS Community postings, the radio will likely have to be sent to Flex for a hardware repair.

A Lapse in Ethical Transparency…

I suspect the previous owner knew about this drifting problem. Since it was still under warranty, he chose to remain silent about it. Of course, I transferred the warranty as soon as my payment for the radio cleared, so I’m covered until the middle of next year. The fact that it was still under warranty (which I verified ahead of time) was the ONLY reason I bought this radio privately. I was prepared to purchase a Certified Pre-Owned unit from Flex, before I saw this one for more than $1,000 less with warranty remaining. It was an easy decision.

I’m considering the purchase of a 10 Mhz reference oscillator, and I’m in the research process ‘as we speak’. I’m not sure yet how necessary it is that I have one, but I could have all three of my Flex radios 5000/6500/6700 GPSDO locked. A GPSDO reference would probably be overkill at K6HR.

Low Cost GPSDO from China
This modified Trimble GPS features 3 10Mhz Sinusoidal Outputs

We’ll see how this turns out. I have complete confidence in Flex based on all my prior dealings with them.

UPDATE: The 6700 needs to go back to Flex for oscillator replacement. I’ll ship it back on Monday 11/5 once I return from vacation.

Back To The Front

Final Ferrite Blitz

My Final Step in RFI Elimination

During the CQWW SSB Contest last week, I discovered two USB related RFI issues. Stray RF was getting into the USB serial adapter used for the Kantronics KPC-3 “Packet Communicator” TNC. I could see the USB device disconnecting/reconnecting over each TX. Stray RF was also getting into one of my APC UPS Back Up batteries, (also connected via USB) causing it to ‘bounce’ as well. The plan was to have all the cable choking done before the contest, but there was a delay. Once I had the problems sorted, I embarked on the final ferrite blitz to choke off ALL remaining unprotected cable ends.

I suppose I could just reduce power and the RFI issues would subside. But what’s the point when top output is 1.2 kw. Of course, I must have the FULL GALLON with ZERO RFI!

I heard about it on the radio!

I heard a QSO on 80m where the topic was the best prices for snap on ferrite chokes. This caught my attention quickly, as I still had a need for dozens more. In short, I learned I had overpaid for the first batch I purchased from one of the major U.S. ham dealers. For the price of 20 pieces there, I was able to buy 30 pieces at the same cost from proaudioeng.com

FAIR-RITE Mix 31 0.4" I.D. Snap On Ferrite Chokes
FAIR-RITE Mix 31 0.4″ I.D. Snap On Ferrite Chokes

I saved a few bucks and purchased 30 more pieces, enough to completely finish all the remaining cabling. Every cable in the rack is fully protected from RFI.  By using the 0.4″ I.D. ferrites, I was able to get two turns on most of them. At this point the only cables without ferrites are the ground straps! A true ferrite blitz!

I was happy to see the problem devices were not protected. Why? Because if they were protected (and still bouncing) I would likely have to relocate them.

I’ll go through high power testing again to determine if either of the trouble devices need to be physically relocated. A few trips up and down the 20 meter band at full power will duplicate the contest conditions, and should be a good indicator of whether or not the problem has been resolved. After all I’ve learned about choking cables, I’m confident I’ll find both device issues have been resolved now that they are completely choked off.

There are just enough ferrites leftover to choke off all the cabling for the upcoming 6500 transceiver installation. I also have the cables set aside for the LP-500 all choked off and ready to go as well.

I’m getting close to the top of the LP-500 waiting list!

Back to the Front


Antenna Coax Grounding

Antenna Coax Grounding

After completing the snap on ferrite installation yesterday I began reading through a couple of new grounding documents I found online. The first to catch my attention was the article Grounding is key to good reception (by IW5EDI) This got me looking in the right direction toward antenna coax grounding and surge protection.

One of the benefits of installing all the ferrite chokes is an electrically quieter operation. Additionally, one of the biggest “wow’s” for me about the Flex 6700 is how quiet the receiver is. It’s incredibly quiet. So I’m very interested in any additional techniques that may enhance station grounding and/or improve receiver performance.

Antenna Surge Protectors

I’ll be adding several antenna surge protectors to my shopping list. I plan to have every antenna protected by a grounded surge protector and have included these in the current upgrade agenda/budget.

In the meantime there’s no reason to delay the grounding of the coax shields. I was looking for coax grounding kits or accessories and found the article The Simple Antenna Grounding System (by K3DAV) . Shown below: K3DAV’s clever solution using hose clamps and a solid copper ground wire connected to a ground rod below.

K3DAV Quick and Simple Ground Clamp Solution

When I rack mounted all the equipment I installed a breakout panel on the back to provide some strain relief and keep the antenna coax leads in an easy to service position.

K6HR Antenna Breakout Panel

I used bulkhead connectors and have a very similar physical arrangement to K3DAV’s on the rear of the panel.

K3DAV's Grounding Solution will be applied across these coax connectors
K3DAV’s Grounding Solution will be applied across these coax connectors

I already have enough of the right size hose clamps, so I’ll only need to purchase a piece of copper wire at Lowe’s and this will be ready to implement. I’ll clamp the copper wire to each connector and tie it directly to the stations single point ground.

This will remain in place until I can obtain the proper surge protectors.

Worth the effort

K3DAV Grounding tip as implemented at K6HR

I made a quick run over to Lowe’s and bought a piece of bare 8 gauge solid copper wire. I decided to install it on the outside of the panel for convenience sake. Once I get the surge protectors, I’ll probably flip it over to the inside since it’s already fitted.

It went in fairly easily. I used a pair of pliers to get all the bends right. It’s not visible in the photo, but the ground wire (exiting in the lower left corner) is tied directly to the Station’s single point ground system.

Non-Scientific Results

Before I attached the coax ground lead I took careful note of the S-Meter reading at a quiet (unused) frequency on 40 meters. Using a  2.7 khz passband, the S-Meter read a steady S4 with an occasional drop to S3. After connecting the ground wire, the meter readings indicate a steady S3 with an occasional bump up to S4. So maybe there is some very small improvement in the noise level. Hi!

Of course the noise level changes during the day etc. so this is admittedly nothing more than optimism! No measurements to back up my ‘claims’ whatsoever. But man, is this 6700 radio quiet or what! Sometimes I can’t even tell if it’s muted or not. Signals just come right up out of nowhere! It’s amazing! If I were to move this station out to a rural environment it would probably read an S1 noise level.

Another thing I notice is I no longer hear the PC speakers hum when the packet radio system transmits a packet. It could be annoying when a packet user would connect and a bunch of packets would start TX’ing resulting in a lot of short bursts of hum. This problem is no longer occurring.

The best $7.00 I’ve spent in a while.

Back To the Front

New Addition: Flex 6500

Going ‘All In’ with FlexRadio!

After working with the 6700 for a few weeks I decided it was time to replace my 6300 back-up radio, with a 6500. The 6300 served me well during my introduction to the 6000 series hardware and SmartSDR. It sold quickly (thanks Leo) and the repaired 6700 and CPO 6500 will be here as soon as the repair is complete. After working my way through all the used listings online, I couldn’t find an available unit for much less than the cost of a  Certified Pre-Owned 6500 with a 1 year warranty. It made the most sense to buy the CPO from Flex. And in light of my experience with the drifting CPO 6700, I decided not to take any chances. The new addition Flex 6500 should complete my radio hardware requirements for the foreseeable future.

The “Business End” of the Flex 6500

Dedicated to Digital

The plan is to purchase a Comet CHA-250B vertical antenna for use with the 6500, and dedicate the radio to digital modes. I’ll experiment with some new (for me) modes like FT8 and PSK and decide at some point which modes to settle on. And of course, I will continue with SSTV and EasyPal.

The purchase of the Flex Maestro freed up this little Gigabyte Brix PC that I used to run SmartSDR in another area of the house.

I need to find a use for the Brix PC!

I’m going to pair up the Gigabyte Brix PC with the 6500 and see how it keeps up. The Brix ran SSDR ok, but the wireless connection was not the greatest. In the new setup, the Brix will be located next to the router. The question is whether or not several programs will run alongside SSDR. We’ll see…

Back To The Front…

Gigabit Switch

10/100:  Too Slow to Rock N Roll

My files are getting bigger, disk image back-ups are accumulating, and big file transfers between machines take forever. It’s time for a gigabit switch.

Gigabit Switch

I’m researching a couple of simple unmanaged devices. The Netgear GS108 and the TP-LINK TL-SG108PE both look like inexpensive solutions. The little 10/100 router I have now was never qualified to handle the data requirements of the entire shack, it was intended for temporary use only.

In addition to moving disk images around, I also have a couple of Flex radios running, an Apache Web Server, JNOS BBS, and whatever family hardware that might be running. The gigabit switch is a necessity even more so now that I will be adding a Flex 6500.

Managed or Unmanaged…

I’ve just started looking at these devices, and have not yet ruled out a managed switch. The family devices will move over to the little router, and all the shack hardware will talk over the gigabit switch. I also plan to look at a couple of 16 port managed switches. If the numbers are in line, I may get the 16 port and have some gigabit breathing room.

And the winner is…

A price driven decision aka ‘an offer I couldn’t refuse’ popped up on eBay last night:

NETGEAR GS108 Gigabit Switch

Purchased for peanuts!

GS108 Arrived Today! Gigabit Holiday Lights!

A BIG Improvement! There will be far less thumb twiddling in the shack going forward…

Back To The Front

Flex 6700, 6500, LP-500, Arriving Soon!

I’m now #2 on the LP-500 waiting list, so it should be arriving soon. It looks like they fulfill about 10 units per week, so I’m pretty confident I should have mine next week . I joined the waiting list in May 2018. This is one of the nice finishing touches being installed for 2018.

Flex Sales and Service Dept.

I was contacted by Flex Service to let me know they expected to get to my 6700 repair  one day this week. As soon as it is ready, it will be shipped back along with the Certified Pre-Owned 6500 that I just purchased. Both these units will be arriving soon and it looks like delivery should coincide nicely with the LP-500

These three units more or less complete the shack. No more improvements for a while. It’s time to get all the shack furniture put back together and get back on the air and get to work!

Back To The Front

Migrating the WordPress Website

Moving from the AMPRNET

As a licensed Amateur Radio Operator, my AMPRNET Gateway has been on the internet for decades with domain services provided by servers at UCSD. The AMPRNET or AMateur Packet Radio NETwork has it’s own dedicated internet address space [44/8] used by amateurs worldwide for experimentation etc.

I am privileged to have my own little subnet allocation of “amprnet” addresses (assigned by authorities) that I use for experimentation, hobby use, and anything else that is FCC legal and not for profit.

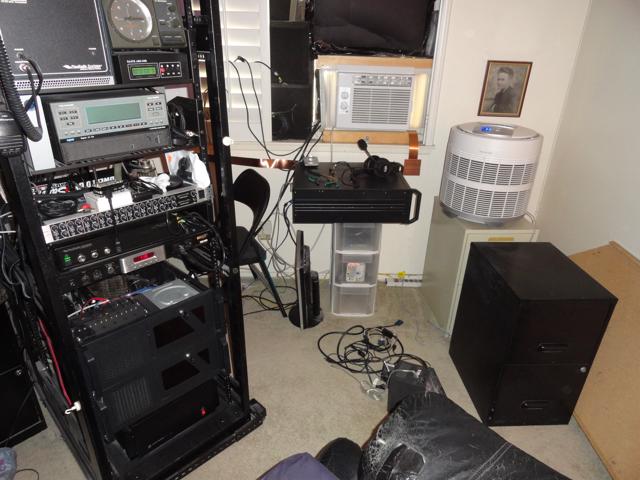
I’ve had Linux servers running in the shack since 1998. As the hobby advanced we were able to link our terrestrial packet radio systems to the internet, and we used the amprnet IP addresses to set everything up.

As time went on I setup an Apache webserver, and created a simple hobby website for displaying the Slow Scan Television (SSTV) images that I received each day. (The K6HR SSTV Server continues to run to this day)

WordPress Site Outgrows AMPRNET

Last December, for fun, I installed WordPress on my amprnet server at: gw.k6hr.ampr.org/blog. Once I realized how easy WP was to use, my WP site really started to grow. As the content increased, so did the search results, and the traffic to the site. Last month the site had over 10,000 visits for the first time. It’s a lot of bandwidth, so to continue using amprnet resources was not only impractical, it was becoming an impediment.

There were a few issues that could only be resolved by changing the domain. What I had was a DNS record that pointed requests for k6hr.com to 44.16.2.58 (gw.k6hr.ampr.org) This configuration worked, but posed several issues.

Google Search Verification Fails

One major drawback was the failure of Google Search Verification. Google requires that you verify your ownership of the domain before they will index your site. They provide several verification methods, and all are simple to use. The problem is that I don’t own or control the “.ampr.org” domain so every verification tool failed. The result was I had no Google search results. ZILCH.

The WordPress SEO has a Bing search verification tool. Lucky for me Bing does not require the level of verification that Google does, so at least I had good Bing search results. (once I got my SEO figured out).

Page Load Times

The page load times reported for the k6hr.com amprnet site were very slow. The speeds were usable hobby wise, but dreadfully slow. The necessity to traverse the amprnet servers was slowing things down as traffic was increasing. i.e. ‘hop check’ results indicated the delay in the amprnet was significant. And, after all, the amprnet is not really intended for this type of traffic load.

Long Ugly URL’s

Having the k6hr.com DNS record pointing to 44.16.2.58 worked, but was somewhat of a kluge. The user would type ‘k6hr.com’ in his/her browser and would be taken to the home page. However, once there, all internal links and URL’s would be prefaced with ‘gw.k6hr.ampr.org’. So if a visitor thought he was on ‘k6hr.com/page’ he might not notice that the bookmark he saved is ‘gw.k6hr.ampr.org/page’. This could cause confusion, as it shows the long complicated URL. And, after the move, these ‘saved’ amprnet URL’s would bring visitors to the wrong place.

AMPRNET Downtime

The amprnet does not go down very often, but it has from time to time over the years. Another type of downtime is when the router at UCSD drops your route as it detects you are not there, such as when you reboot or have to temporarily disconnect your machine. Every time the connection is interrupted, UCSD drops the routing for 20 minutes or so before checking again and reestablishing the route. They have valid reasons for this, and it is understood within the amprnet community.

I needed to move an ethernet cable to a different port and disconnected it for only seconds before my amprnet routing was interrupted. Of course, after the requisite 20 minutes, the routing returned.

Migrating the WordPress Website

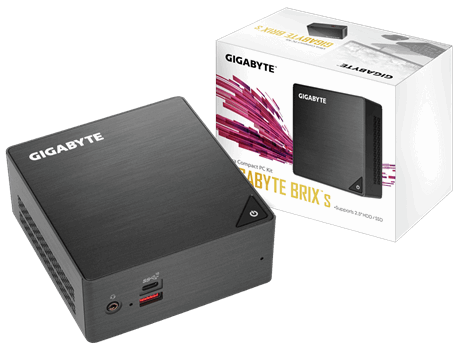
It was time to straighten up and fly right. As part of the 2018 upgrades I built a new Intel i5 PC and installed Ubuntu 16.04.5 LTS on it. The previous server ran on an old Pentium D with 1GB RAM so this would be a big improvement with 4GB RAM and a 500GB SSD.

I found this article with step by step instructions and read through it. It seemed to be a fairly straightforward process. I had nothing to lose on this new machine, so there was no pressure of making (or repeating) a mistake.

Once I had SAMBA working on the new PC, copying over the original WP files was easy. In the article it was suggested that using the “Search Replace DB” script found on github would make changing all the URL references in the database much easier, but after fiddling with it for a while I could not get it to work. I decided to try using the replace command in Midnight Commander instead.

First I made a backup copy of the current WP database

1
2
>mysqldump -u root -p mydatabase > mydatabase.sql
Enter password: **********

Next, I opened the mydatabase.sql file in Midnight Commander and did a replace gw.k6hr.ampr.org with k6hr.com and crossed my fingers. It went on processing much longer than I expected, but in the end had made over 7,000 replacements.

As explained in the article, the .htaccess file in the WP root directory must be edited to reflect the new domain, and the wp-config.php file also requires an edit. In my case I used the same db name, and user name, so all I had to edit was the password, as I had not used the same PW again for this install.

Next, I imported the modified mydatabase.sql file into the new database I just created using the same dbname.

1
2
>mysql -u root -p mydatabase < mydatabase.sql
Enter password: **********

To test the WP installation I opened the site on the localhost and to my delight everything appeared to be working!

I did encounter one problem, but it was easily resolved after following the suggestion in this Google search result.

Updating the DNS records

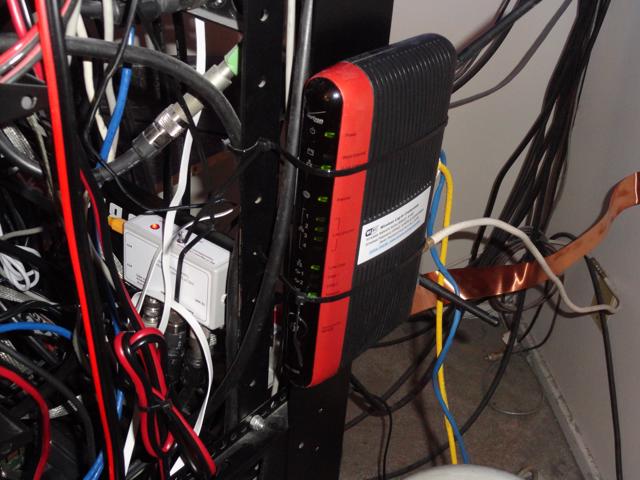
I logged in to my web hosting service and changed my DNS record to point to the IP address of my Frontier FIOS router. Next I logged into my Frontier router and deleted the ‘http’ port forwarding rule to the amprnet server and replaced it with a forwarding rule to the new machine.

Sounds good! I should be all set!

It works, but…

The new server is up and running and I am no longer pointing my DNS or router forwarding rules to the old machine. The new site working great! I’m enjoying the major improvement in page load speed!

But as I test further I find that the old amprnet machine is still serving webpages! How can this be possible?

After some head scratching I realized the amprnet machine is in my routers DMZ. (that ‘http’ port forwarding rule meant nothing!) This means folks could connect to the amprnet machine and land on an out of date version of the site.

You’re thinking why not just stop the Apache server on the old machine?

Webalizer Stats

Before I turn off the old Apache server I need to migrate Webalizer and all of its stats. I haven’t quite figured it out yet. The traffic is still registering as the old site and nothing’s updating on the new machine yet.

I’m sure this is because the traffic is visiting the old URL directly.

I decided to try my hand at ‘redirection’. I think if I redirect the traffic to the new machine then I will keep the traffic flowing from those direct connections to the old URL. Now that I’ve hit 10,000 visits per month I don’t want to screw it up.

Redirection

The redirection was simple following the instructions in this article. I just added that simple bit of code to the top of the index.php file in the old WP root directory, and Voila! It works like a charm! Now all traffic ends up on the new website. Now I’m in no hurry to turn off anything on the old server.

Google Search Verification Success!

Now that I have eliminated the use of the amprnet, and pointed my DNS directly to my home router IP, the verification steps were all completed in a matter of seconds. I have finally, successfully, verified my domain ownership (via multiple verification methods) on Google!

I was immediately able to find search results. Prior to these changes there were absolutely no search results on Google whatsoever!

Now that Google is indexing my WP site it won’t be long before detailed search results begin to appear, and traffic really starts to pick up!

This WP site will be one year old on 12/10/18 and ready for action with all these great improvements and breakthroughs.

Back To The Front

Migrating Apache2 Log Files

Migrating Apache2 Log Files

I got my second wind after successfully migrating the WordPress website and got to thinking about moving all the log files. I plan to keep all the stats I accumulated under the old domain and continue forward.

After several failed attempts at migrating Webalizer I gave up and decided to look for  a more up to date log analyzer. I quickly found out my first choice, the “GoAccess” log analyzer, would not work for my purposes, so I started looking for something else and came across “AWStats”.

Moving On From Webalizer

Webalizer is like a trusted old friend. Webalizer has been running here for so long, I wondered how I’d ever get along without it. One look at AWStats and I was ready to switch. It makes Webalizer look like something from the Flintstones!

AWStats

I was successful in transferring the log files from the old domain to the new domain. I was able to work it out after reading this article and combining it with ideas presented in a second article.

Steps taken:

  1. Delete all existing files in the AWStats DataDir  ‘/var/lib/awstats’
  2. Combine all my log files using the utility “logresolvemerge.pl” into one ‘masterlog’ file.
  3. Temporarily modify awstats.conf to update from the ‘masterlog’ file.
  4. Run the update.

Voila! The previous years logs were successfully imported into AWStats!

Next, I went back to the ‘awstats.conf’ file and set it to back to read the daily Apache2 access.log file

Log File / Domain Overlap

The Apache server is still running on the old domain. I can see there are still some connections to it, so I put a redirect on the entry page, and another redirect on my other high traffic page.

Using redirects, we can ensure all clients using outdated bookmarks will be taken to the same page on the new server.

After this, the only connections I should see should be direct connections to old domain URL’s from stale bookmarks.

I plan to let the Apache servers overlap in operation for the remainder of the month of December (2018 for that matter). On January 1, 2019 I will take the old Apache server offline for good. By that time all the search engines should have my entire site indexed, and I hope to have AWStats completely tweaked out by then.

Back To The Front